PATCH UPDATE ANNIVERSARY 4 YEARS

Here are the full details of 12th September 2024 Patch Update | RBRC's 4th Year Anniversary
1. 2 New Cars
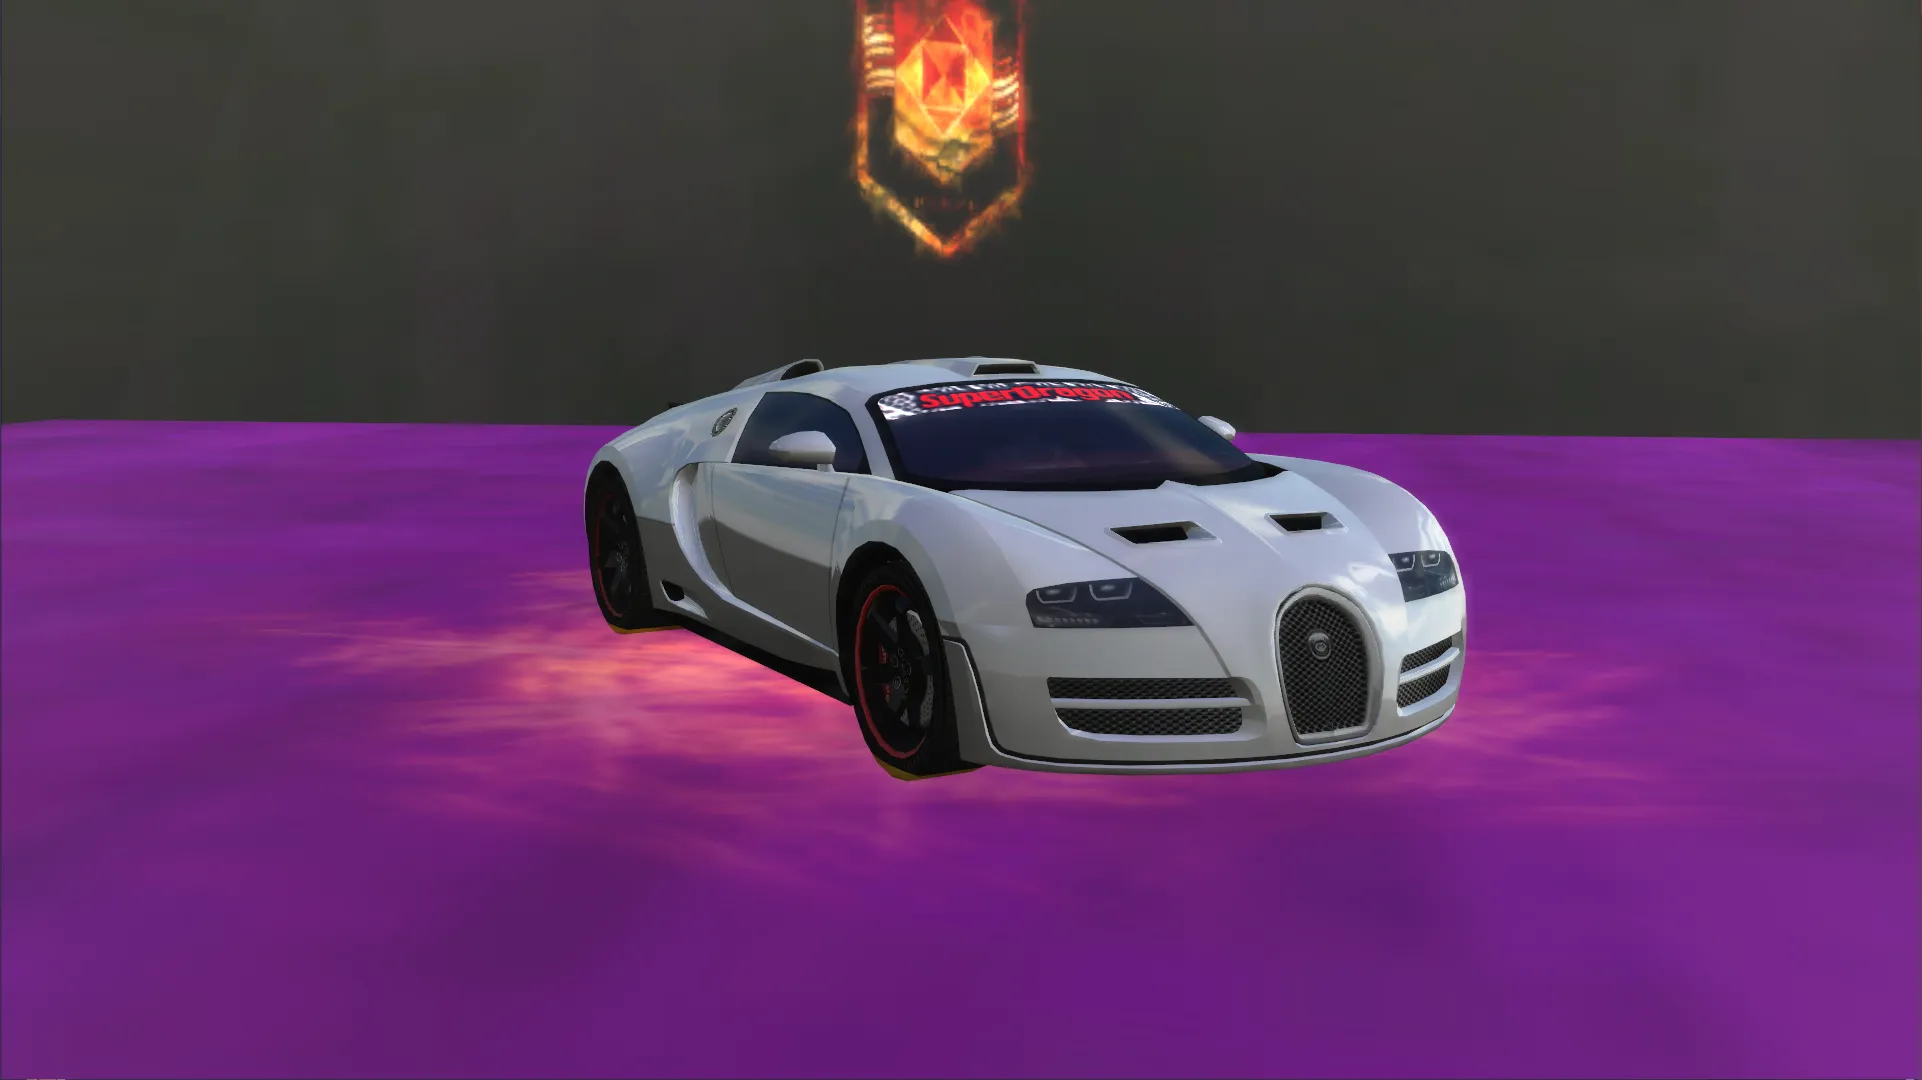
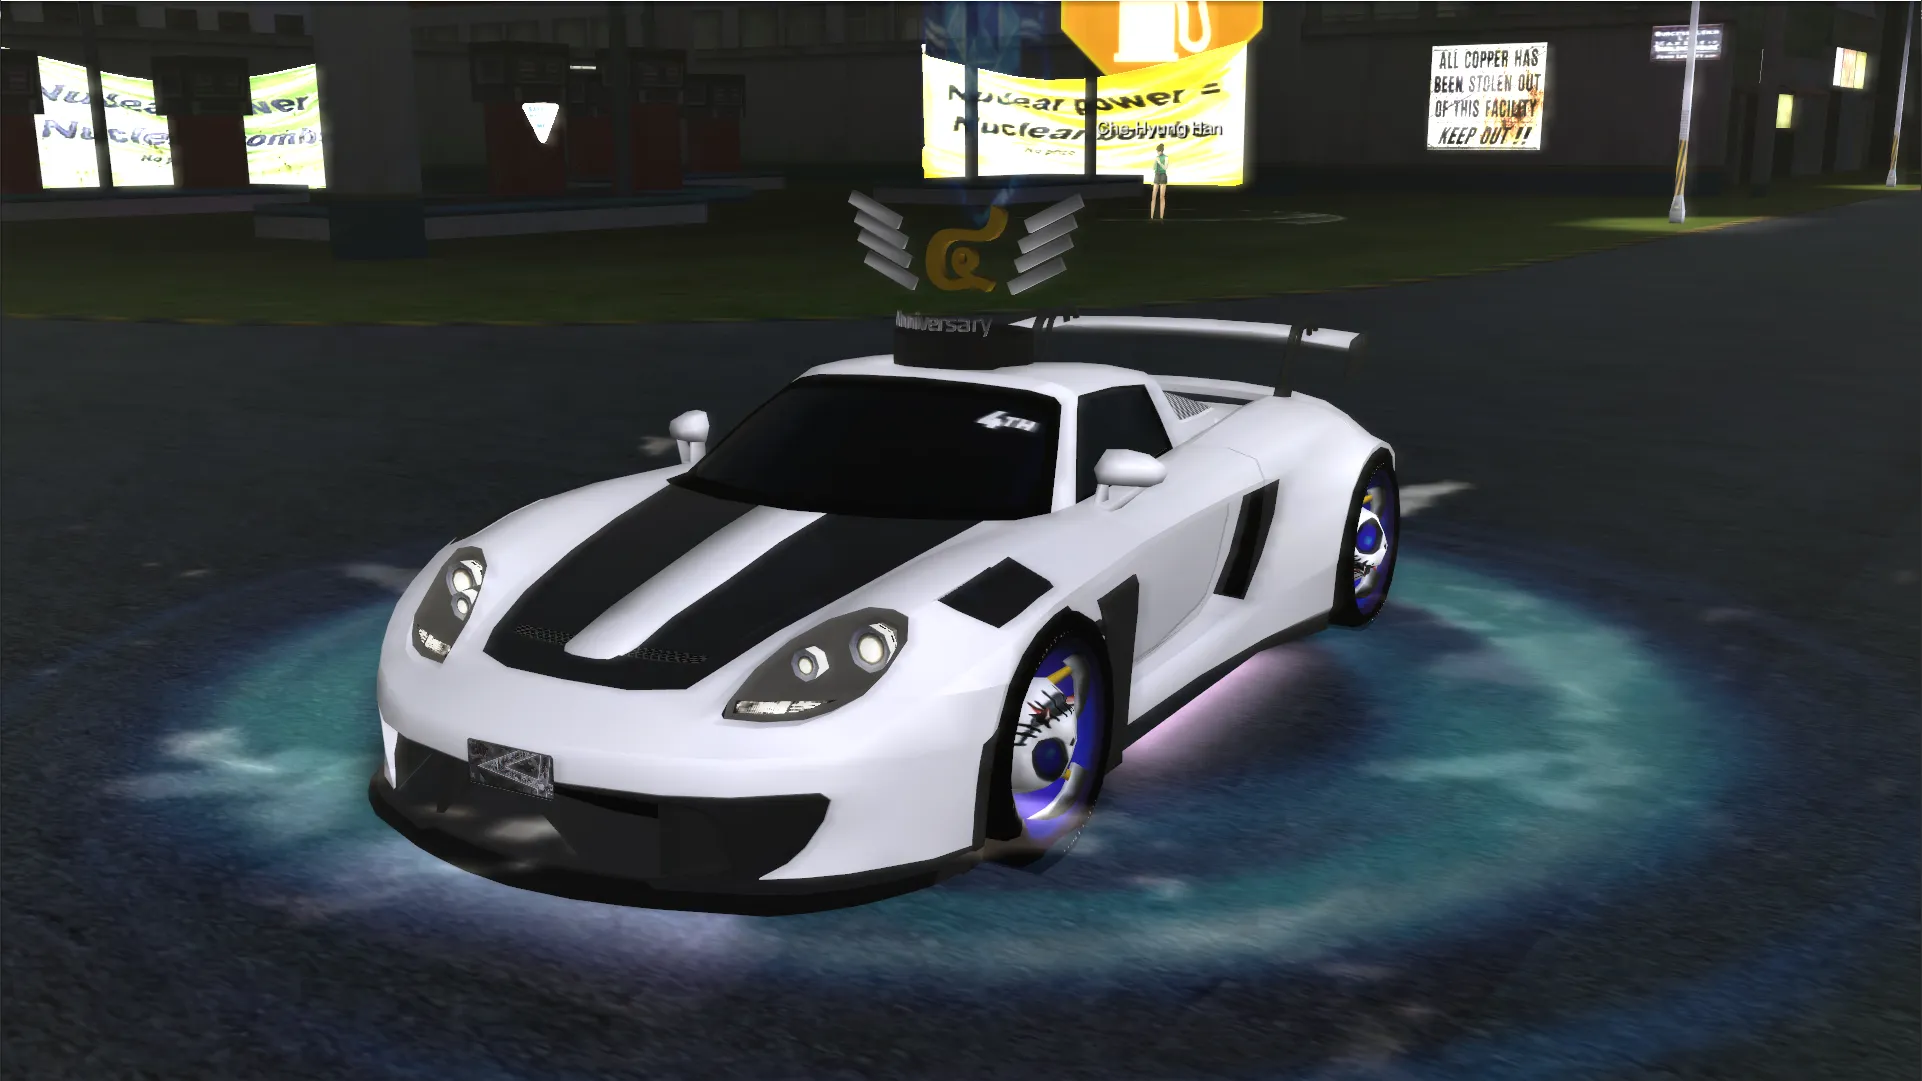
1.1 Pegasus [Legend]
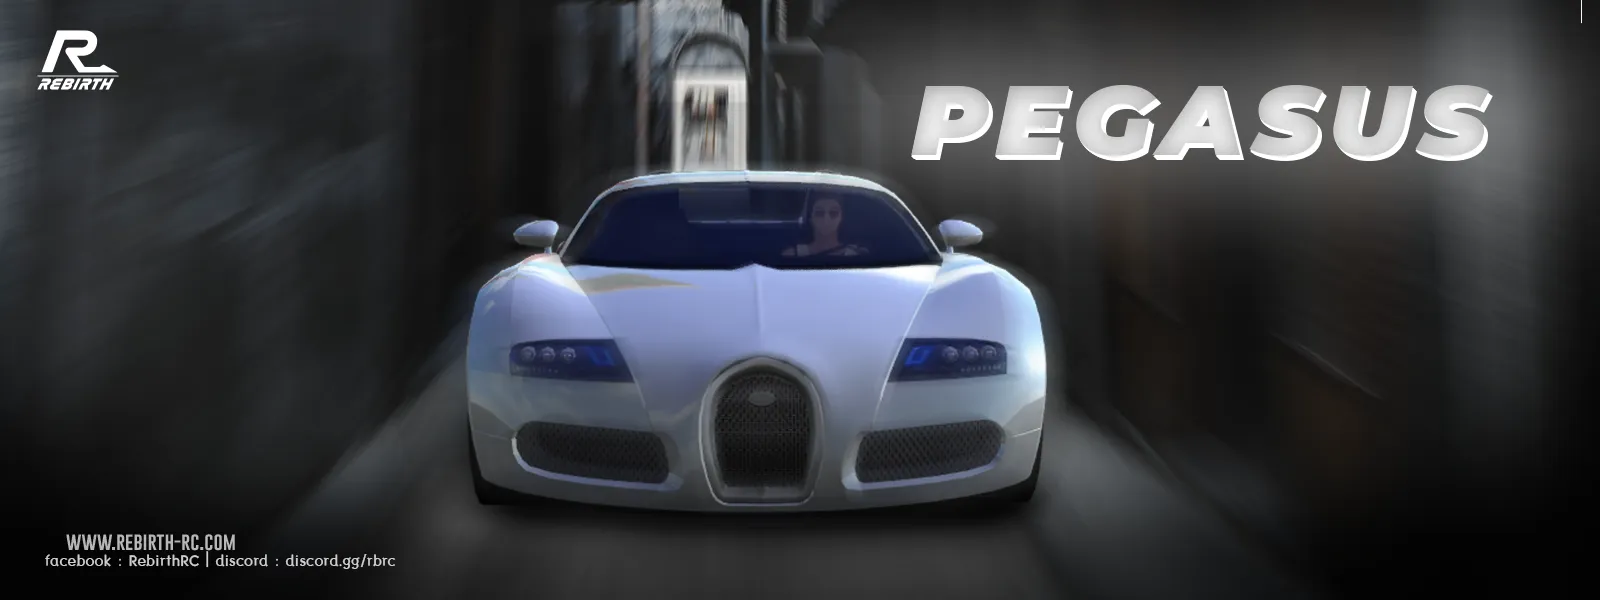

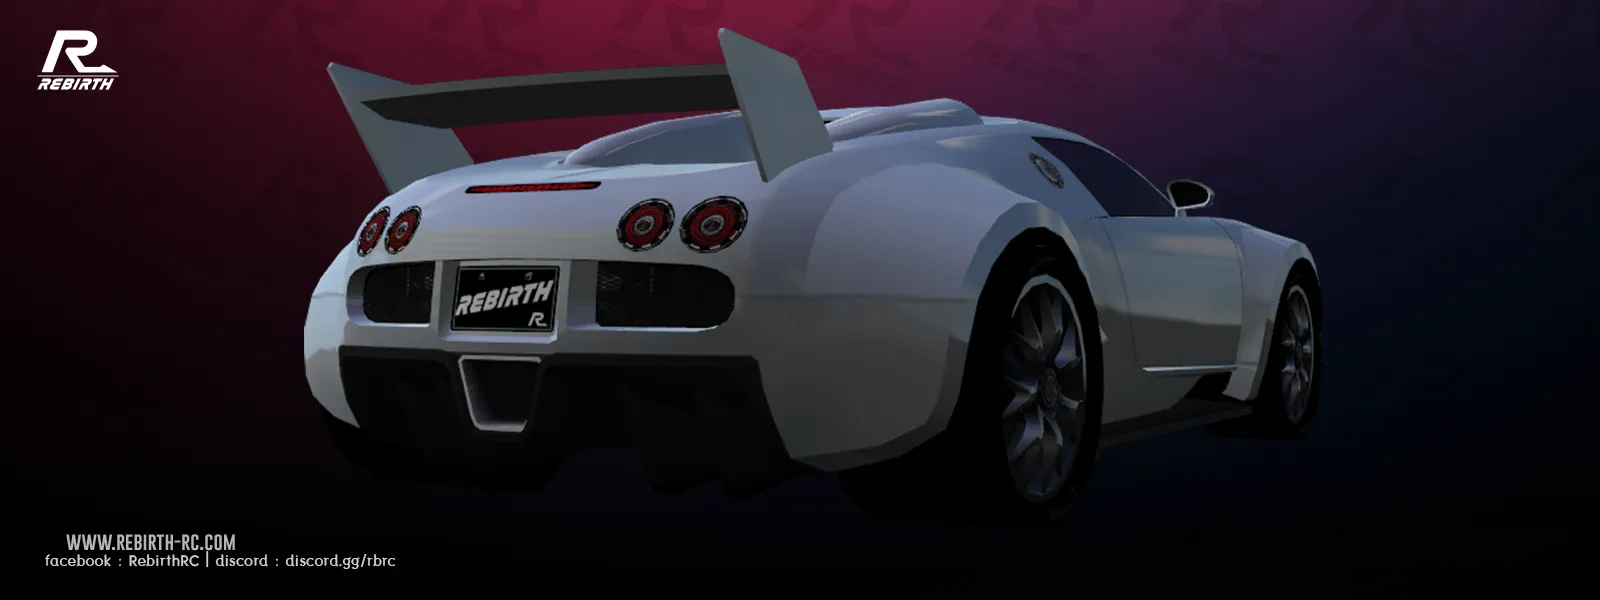
Picture 1.1) Pegasus Showcases
Available via Auto Shop
Driver Lv. 45, Car Lv. 1, Price 179,000,000 RAIN
Obtain via Special Requirement
By unlocking the quest on Driver Lv.45 and complete [Legend] Pegasus Bingo
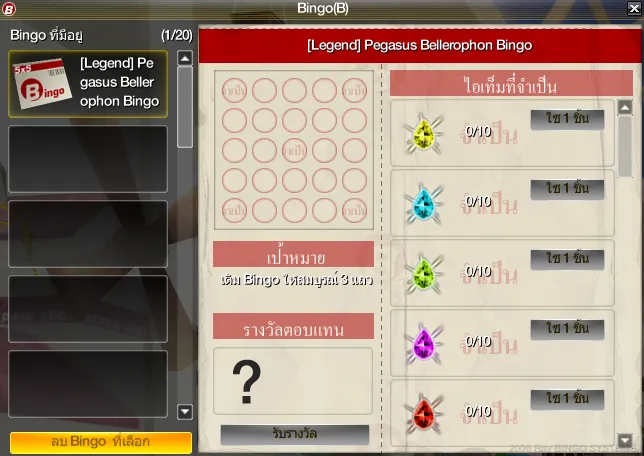
Picture 1.2) [Legend] Pegasus Bingo
When use the Bingo, it will show items requirement
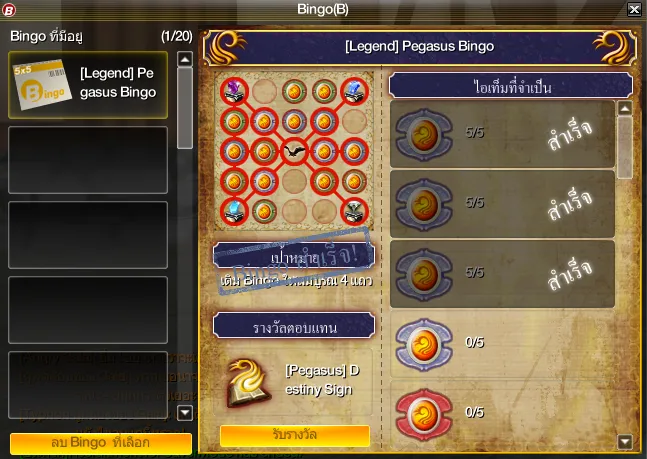
Picture 1.3) [Pegasus] Bingo Showcase
Player have to collect Angel's Sign from each NPCs
-
-
- Jiyong ผู้ฉลาดเฉลียว (Jiyong the clever)
- ชินกิ (Shinki)
- ทาเคชิ (Takeshi)
- เด็กสาวที่มีโลกส่วนตัวสูง (Girl who has highly private world)
- [Hardcore]Aerith สาวดอกไม้ ([Hardcore] Flower Lady Aerith)
-
Other than that, player have to buy [Legend] Phoenix Lamp and collect boxes of jewelry
When complete the Bingo, player will receive the [Pegasus] Destiny Sign for starting the quest by double click the item.
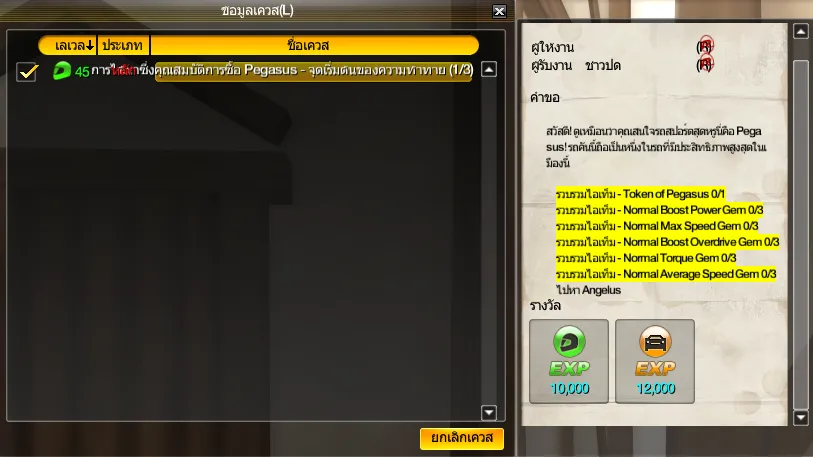
Picture 1.4) Pegasus's Car Quest (1/3)
These are quest condition,
-
- Collect Token of Pegasus - 1 Piece
- Collect Normal Boost Power Gem - 3 Pieces
- Collect Normal Max Speed Gem - 3 Pieces
- Collect Normal Boost Overdrive Gem - 3 Pieces
- Collect Normal Torque Gem - 3 Pieces
- Collect Normal Average Speed Gem - 3 Pieces
Read 2.1 on how to collect Token of Pegasus
After complete (1/3) quest, player will receive (2/3) quest.
Here are (2/3) quest condition,
-
-
[Hardcore] Flower Lady Aerith ([Hardcore] Aerith สาวดอกไม้) Excellent - 12 Times
-
Shinki (ชินกิ) Excellent - 12 Times
-
The Famous Uranus (ดาวยูเรนัสที่ถูกกล่าวขาน) Excellent - 12 Times
-
Joong-Chul The Sober (Joong-Chol ผู้เงียบงัน) Excellent - 12 Times
-
Donggeun Master of Delivery (คิงดอง Delivery) Excellent - 12 Times
-
After complete (2/3) quest, player will receive (3/3) quest.
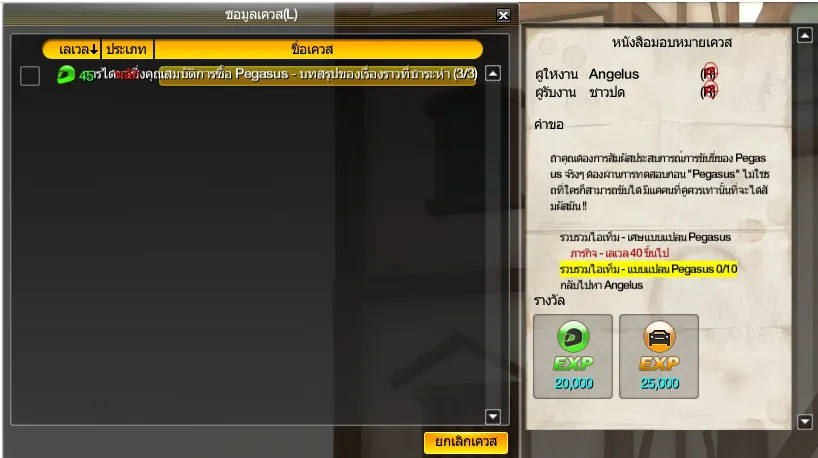
Picture 1.5) Pegasus's Car Quest (3/3)
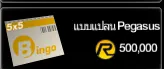
On the final quest, player have to collect Pegasus Blueprint (แบบแปลน Pegasus) - 10 pieces
Read 2.2 on how to collect Pegasus Blueprint (แบบแปลน Pegasus)
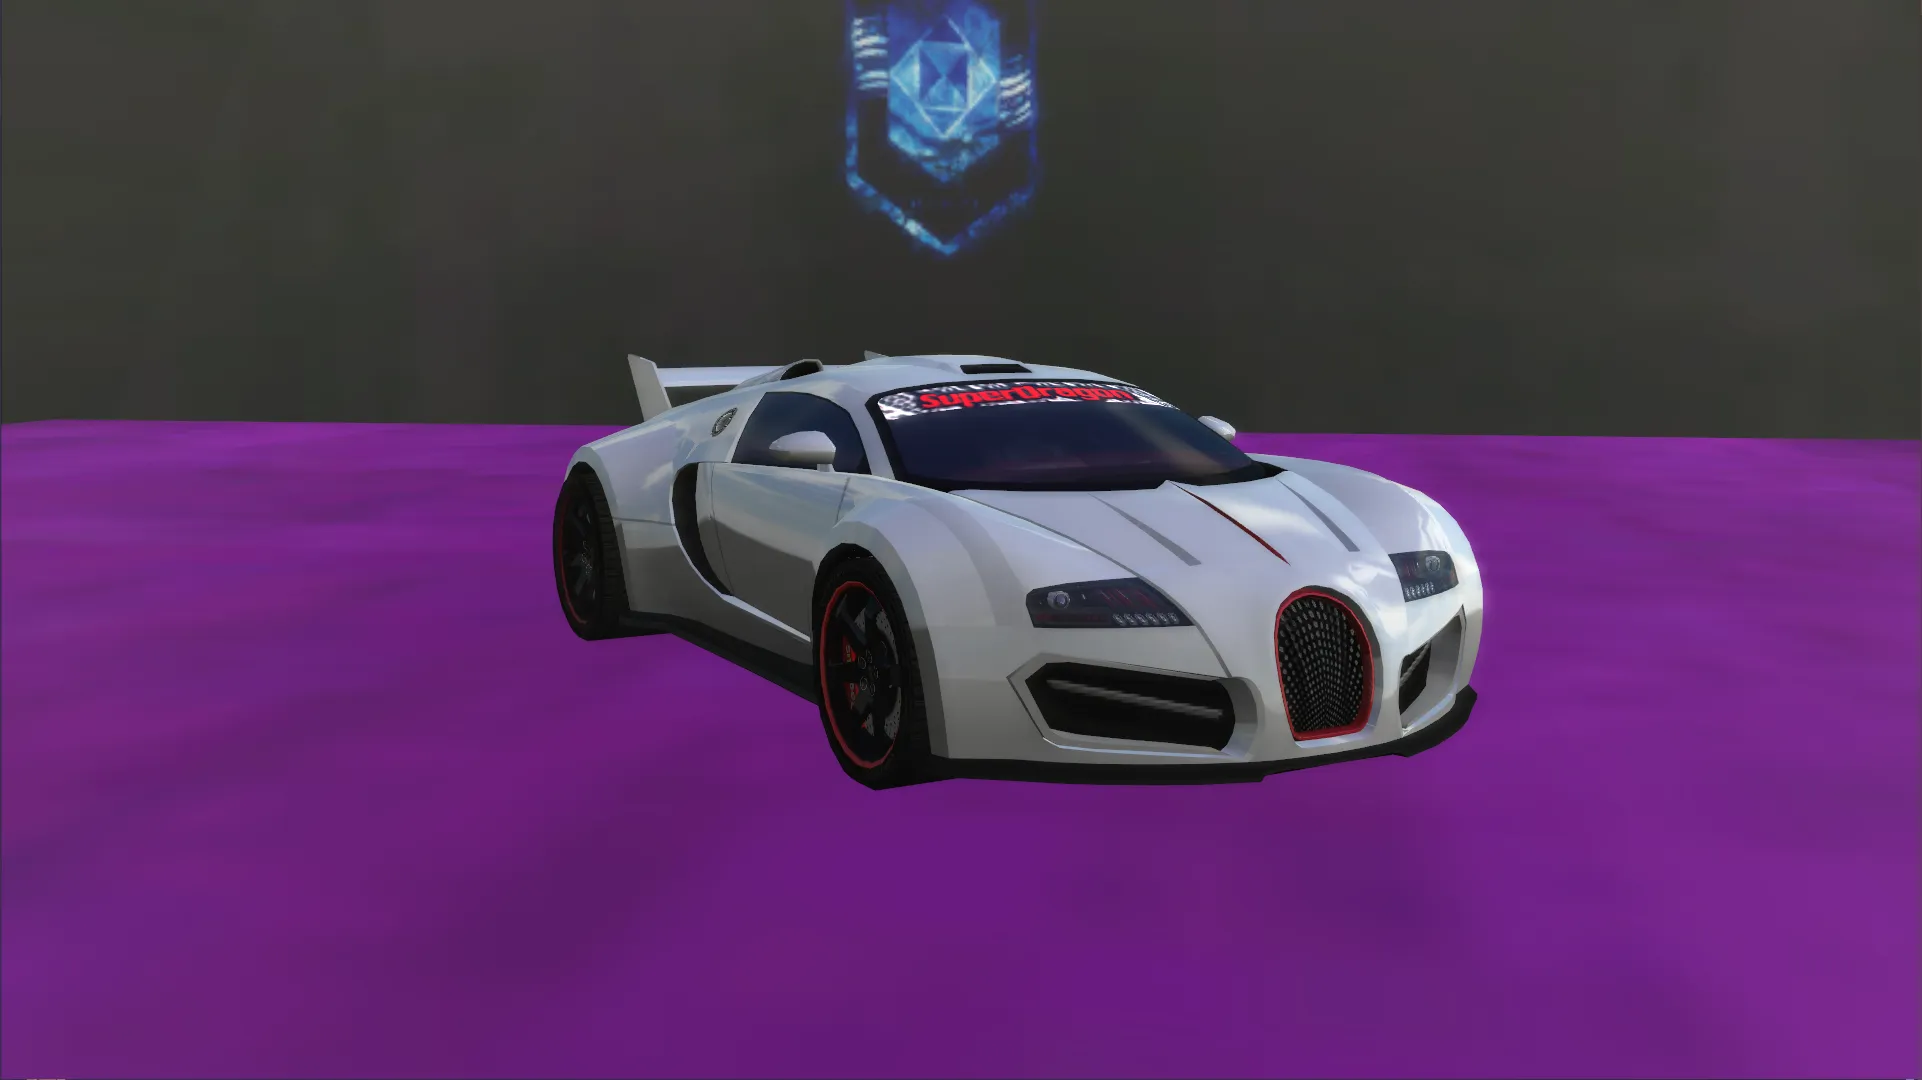
Pegasus - Gorgon
Picture 1.6) Pegasus Gorgon Showcase
Bonus Set
Booster Power +48.0 (%)
Max SP +20
Torque +60.0 (Nm)
Max RPM +30
Boost Overdrive +24.0 (%)
Booster Longer +0.30 (Secs)
This set can be found on NPC: เด็กสาวที่มีโลกส่วนตัวสูง (Girl who has highly private world), which will be drop on Golden Dice form.
Pegasus - Bellerophon
Picture 1.7) Pegasus Bellerophon Showcase
Bonus Set
Booster Power +50.0 (%)
Max SP +22
Torque +65.0 (Nm)
Max RPM +35
Boost Overdrive +26.0 (%)
Booster Longer +0.50 (Secs)
This set can be obtain by Pegasus Bellerophon Bingo, for more details please read on 2.3
Special
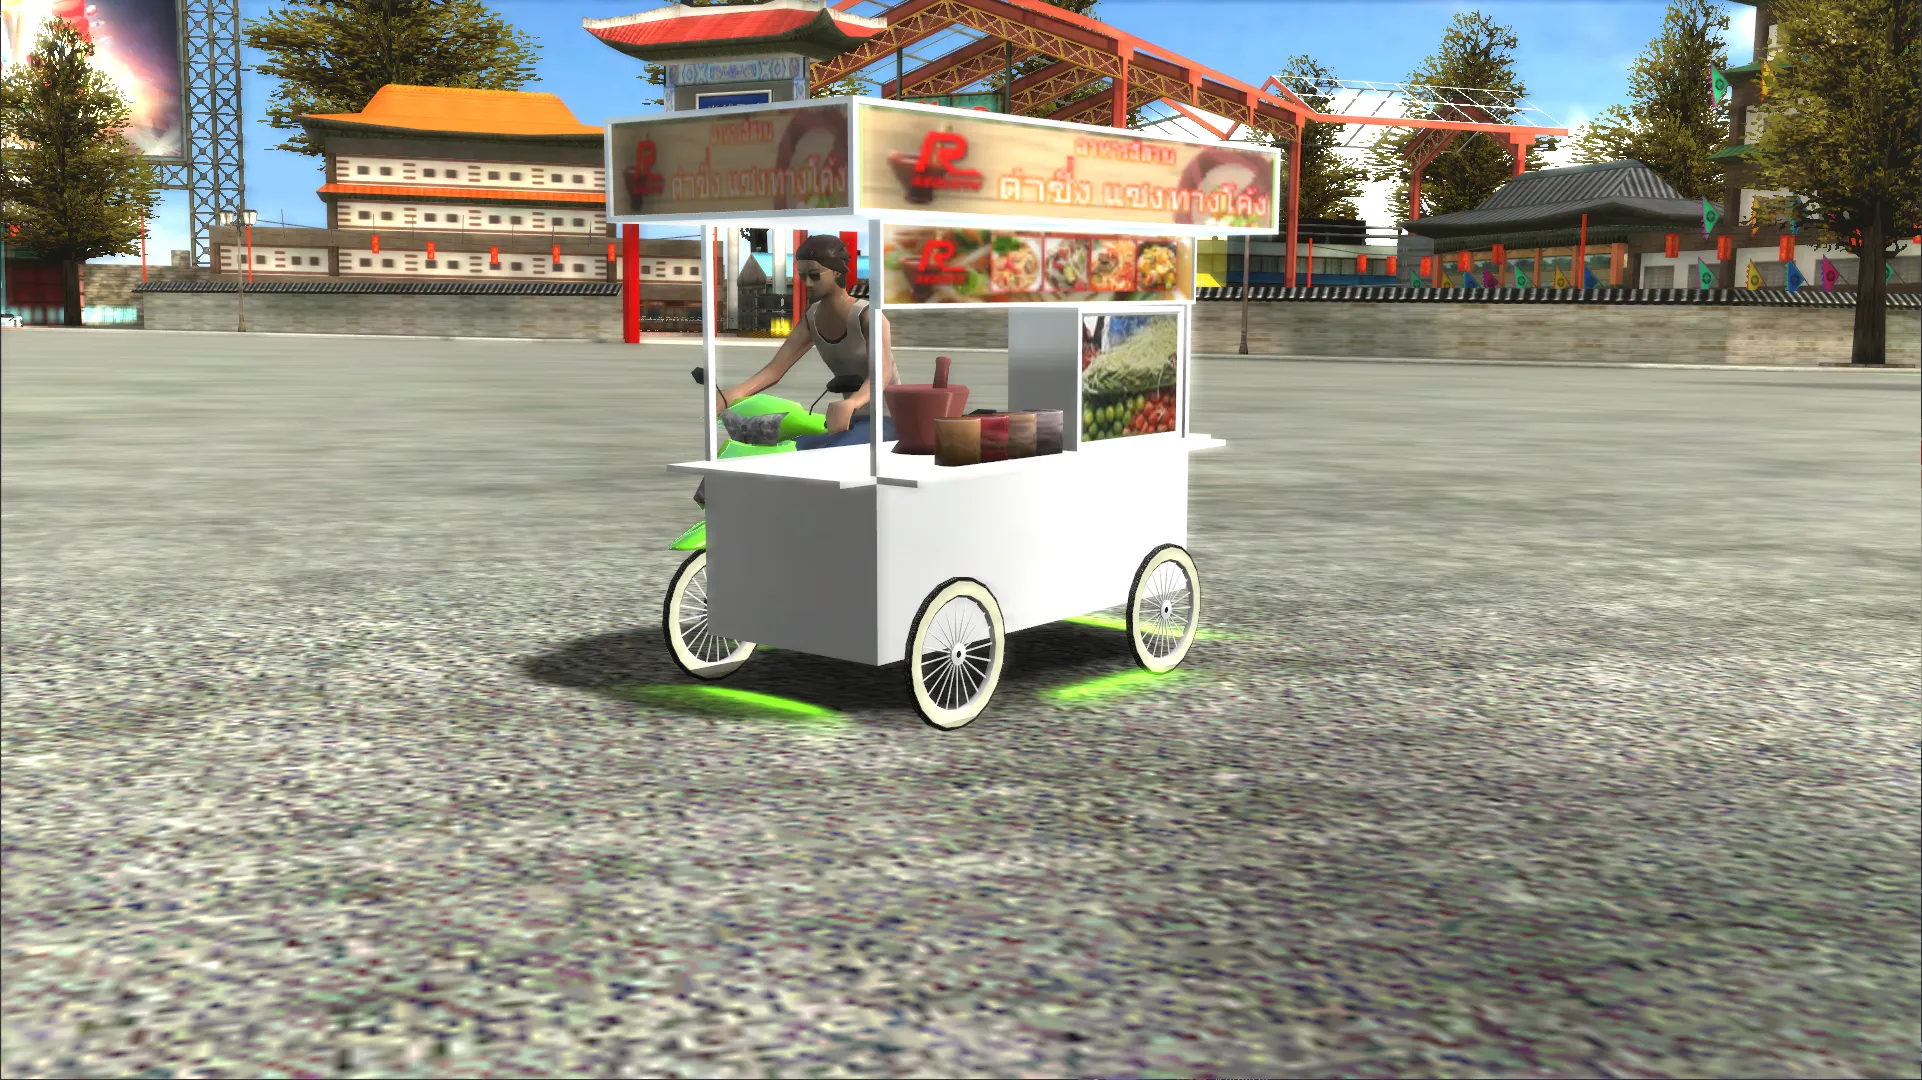
1.2 Lumican [Legend]
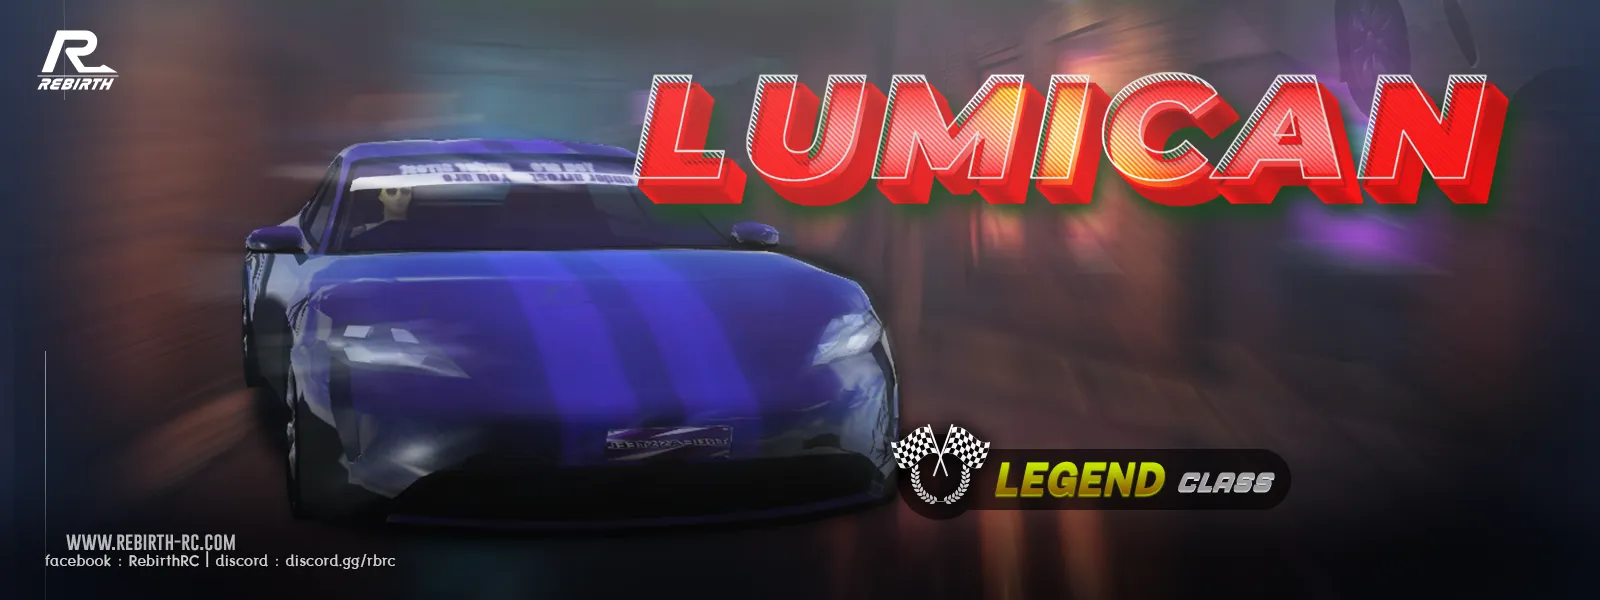

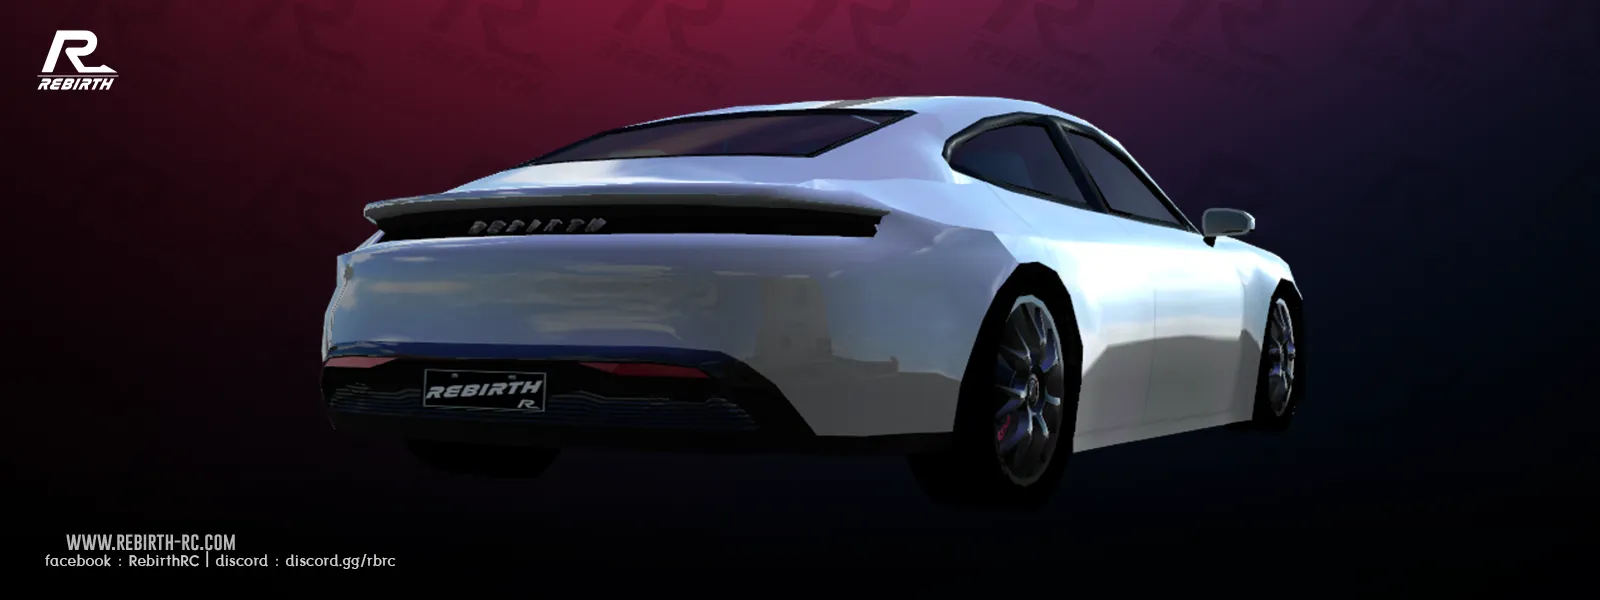
Picture 1.8) Lumican Showcases
Available via Auto Shop
Driver Lv. 40, Car Lv. 1, Price 123,456,789 RAIN
Obtain via Special Requirement
By unlocking the quest on Driver Lv.40 and complete [Legend] Lumican Bingo
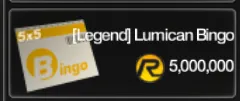
Picture 1.9) [Legend] Pegasus Bingo
When use the Bingo, it will show items requirement
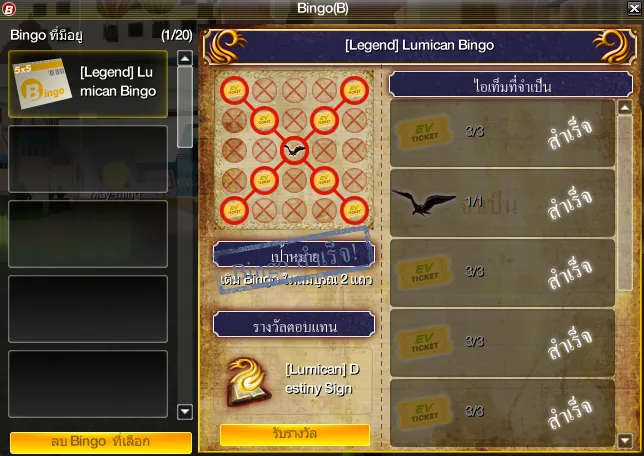
Picture 1.10) Lumican Bingo Showcase
Player have to collect EV Ticket 3 pieces per 1 bingo slot, which can be found on Gold Capsule on 4.3.
Other than that, player have to buy [Legend] Phoenix Lamp to complete the bingo.
When complete the Bingo, player will receive [Lumican] Destiny Sign for starting the quest by double click the item.
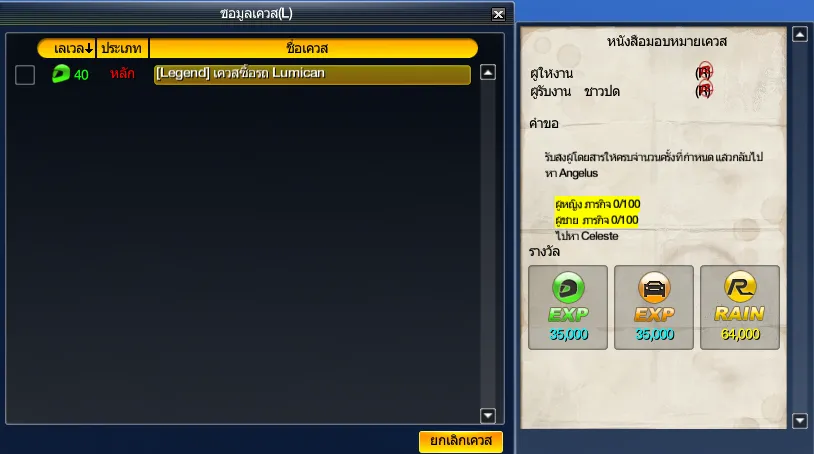
Picture 1.11) Lumican Car Quest
These are the conditions
-
- Male - 100 Times
- Female - 100 Times
The numbers will count by choosing the right NPCs appearance.
2. New Item
2.1 [Legend] Pegasus Token Bingo can be found on NPC Angelus Price 10,000,000 Rain

Picture 2.1) Pegasus Token Bingo
2.2 Pegasus Blueprint Bingo can be found on Bingo Shop under Quest
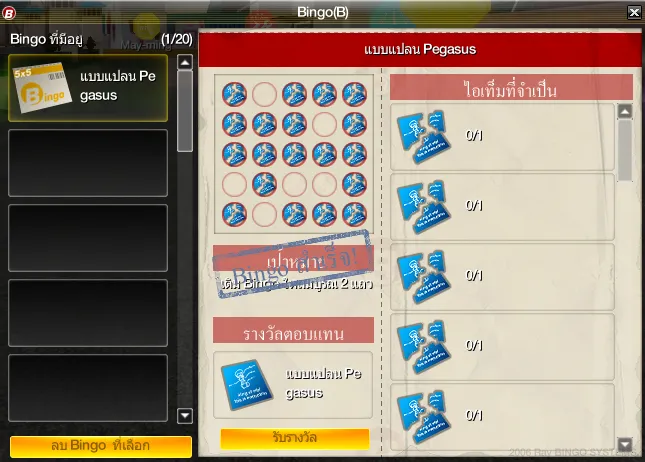
Picture 2.2) Pegasus Blueprint Bingo Showcase
When complete the Bingo, will receive "Pegasus Blueprint",
Pieces of Pegasus Blueprint possible drop on every NPC above Lv.40.
2.3 New items drop
Bingo Pegasus Bellerophon can be found on NPC: เด็กสาวที่มีโลกส่วนตัวสูง (Girl who has highly private world), which has 16% rate drop.
Picture 2.3) Bingo Pegasus Bellerophon Showcase
Pegasus Bellerophon, 1 and 2 can be found on NPC: [Hardcore] Flower Lady Aerith ([Hardcore] Aerith สาวดอกไม้) with 50% rate drop.
Pegasus Bellerophon, 3, 4 and 5 can be found on NPC: Shinki with 50% rate drop.
2.4 Rune
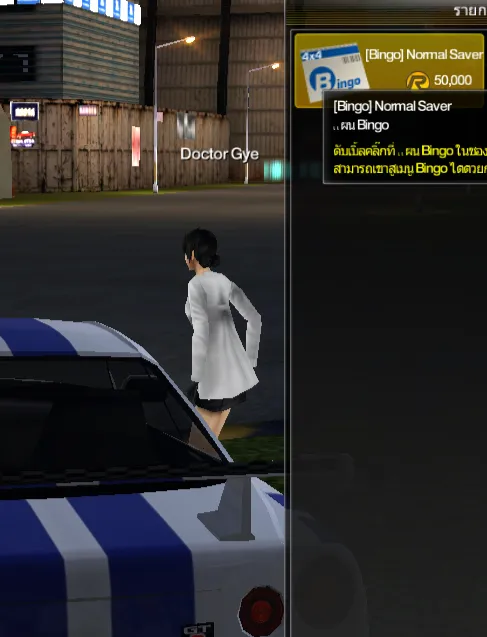
Power Rune Bingo is available on Bingo Shop and NPC Doctor Gye price 100,000 RAIN
Rare Rune Bingo is available on Bingo Shop and NPC Doctor Gye price 100,000 RAIN
Unique Rune Bingo is available on Bingo Shop and NPC Doctor Gye price 200,000 RAIN
Read 4.5 on how to get Rune Stones.
2.5 Rune Converter available in Shop for 1,750 Cash
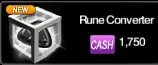
Picture 2.4) Rune Converter
Rune Converter can be use with Power Rune, Rare Lambda Rune, Rare pie Rune, Unique Lambda Rune, Unique pie Rune and Unique tau Rune.
2.6 Turbo Charger Bingo is available at NPC Doctor Gye price 50,000 RAIN
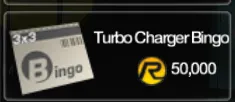
Picture 2.5) Turbo Charger Bingo
Turbo Charger Bingo uses Saver Token and Rune Stones.
When complete Turbo Charger Bingo, will receive an item "Turbo Charger"
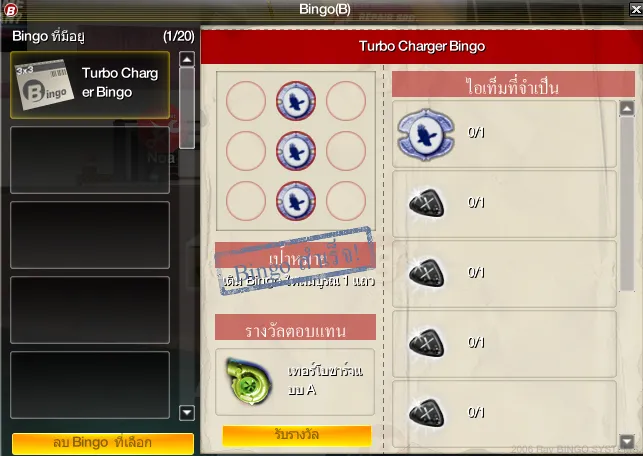
Picture 2.6) Turbo Charger Bingo Showcase
These are options
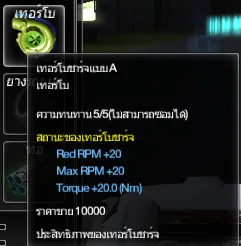
Picture 2.7) Turbo Charger Options
Caution: Do not put the item into the Market, If player misclick, player have to wait for the system to pull it back. And other player will not see Turbo Charger in the Market, If player want to do trading we'd recommend by doing through trading system.
2.7 Upgrade Saver Bingo is available at NPC Doctor Gye price 50,000 RAIN
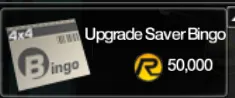
Picture 2.8) Upgrade Saver Bingo
When complete the Bingo, will receive Upgrade Saver
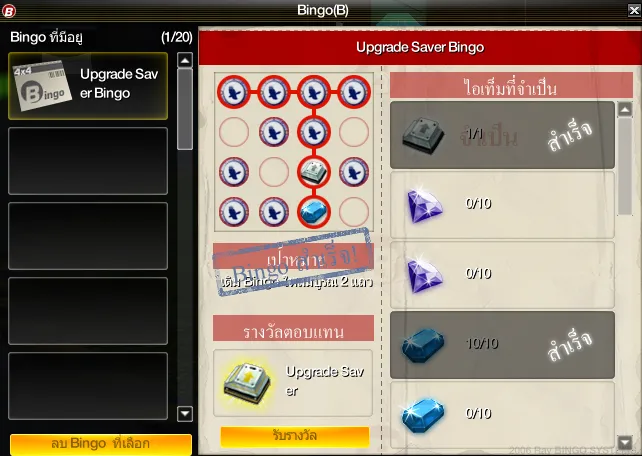
Picture 2.9) Upgrade Saver Bingo Showcase
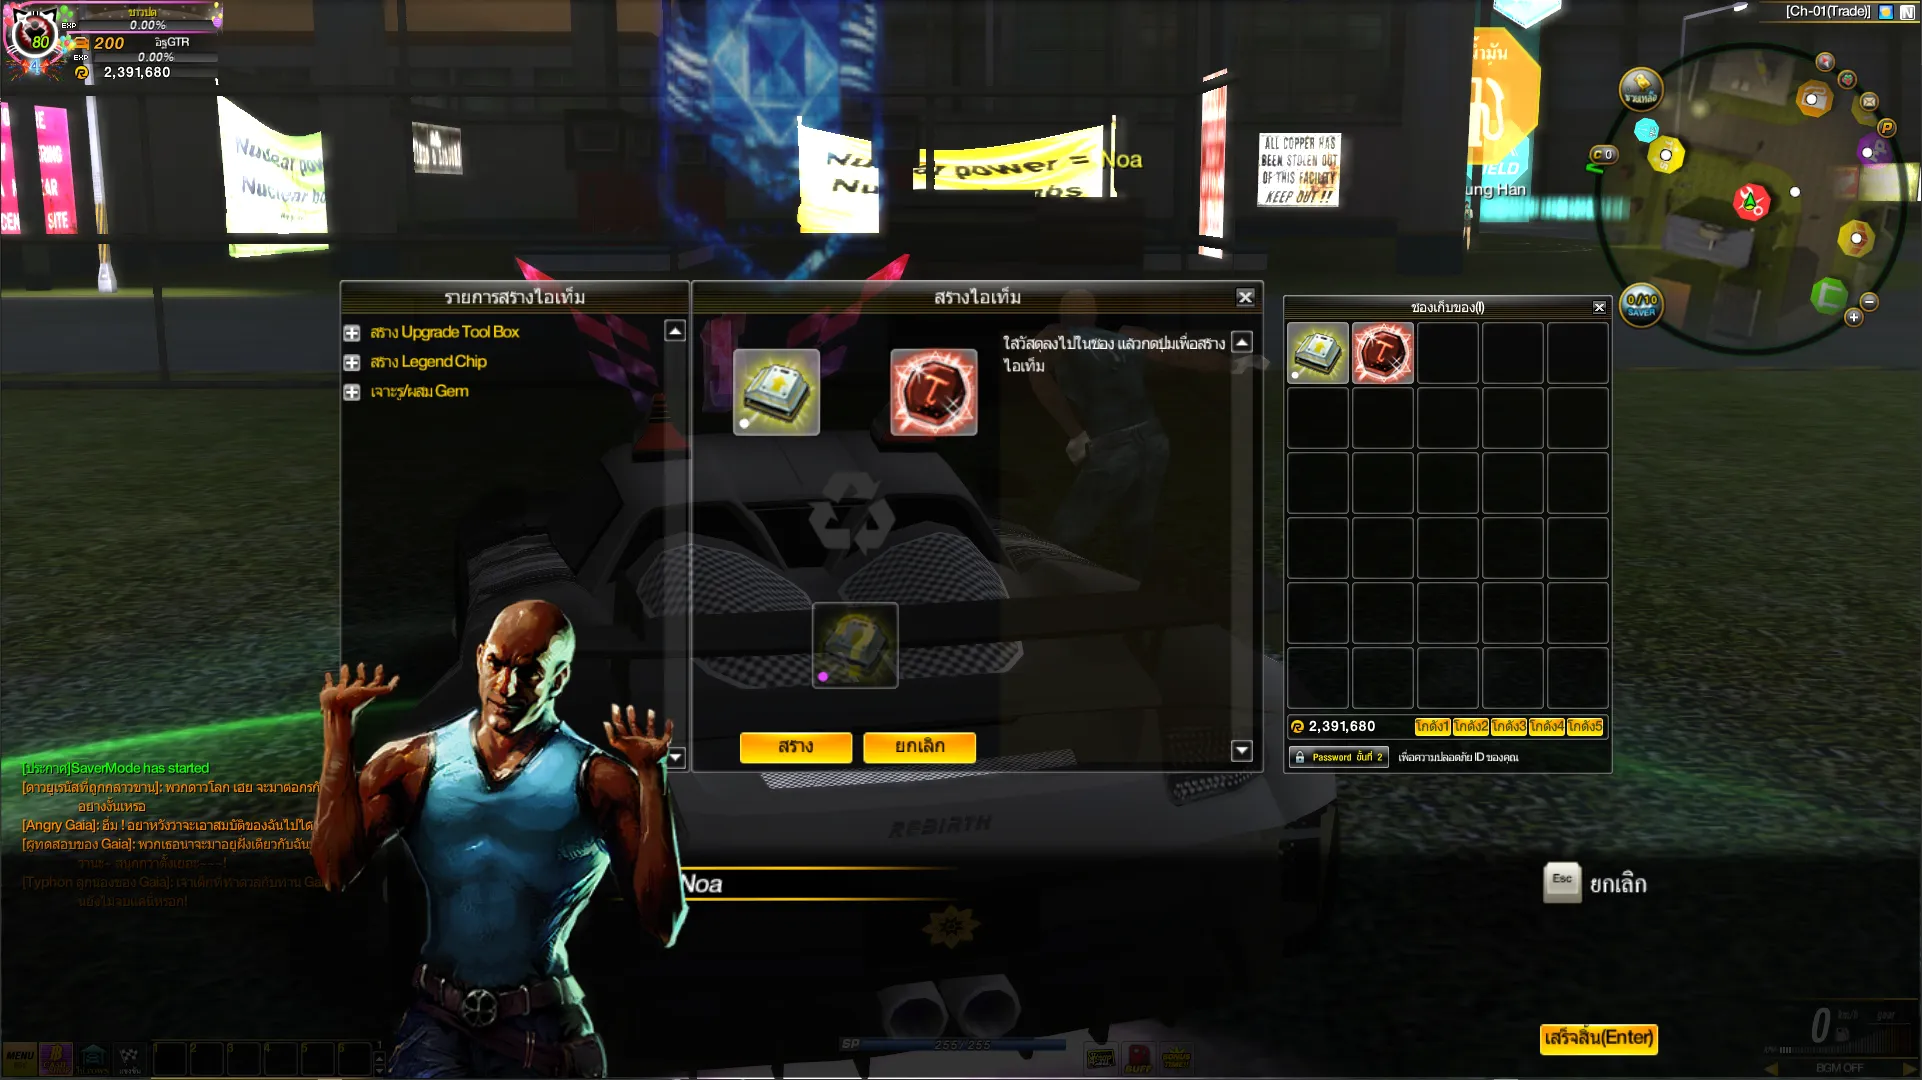
How to [Drill] Upgrade Saver
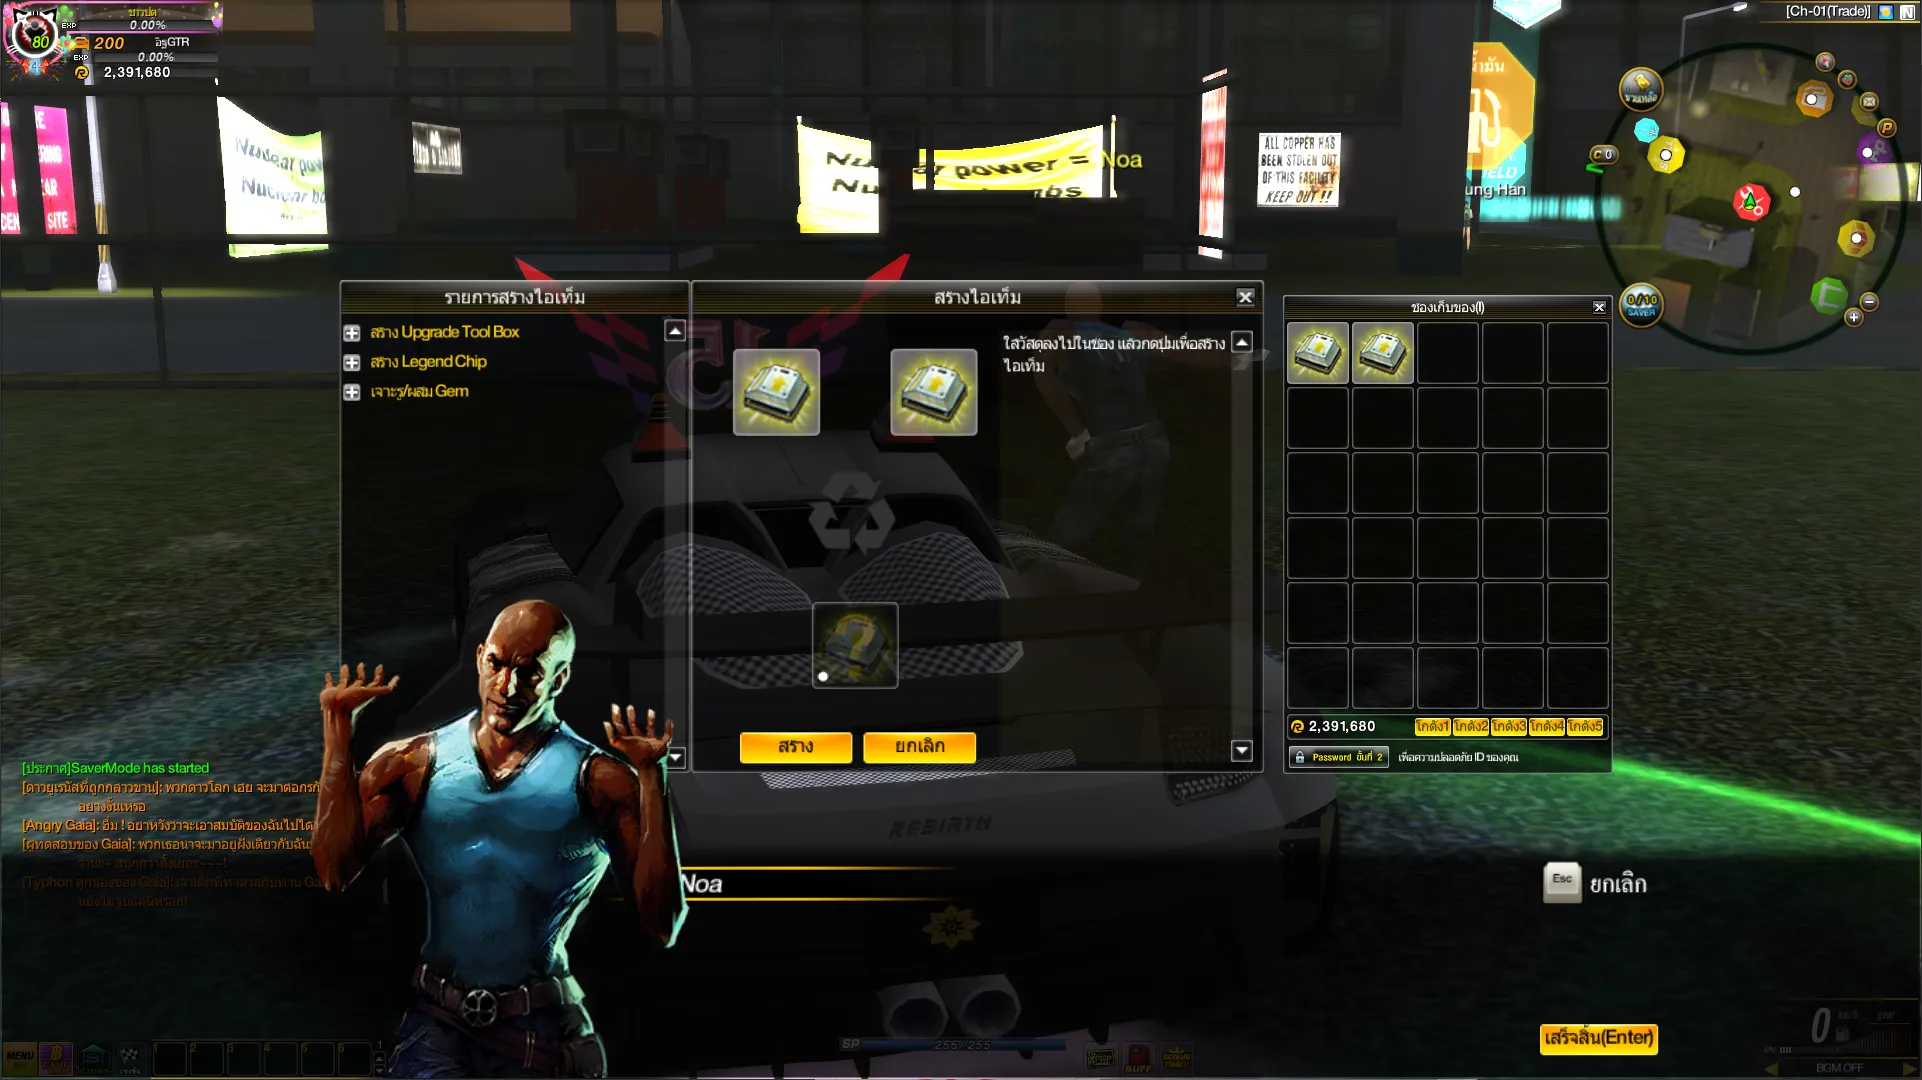
Picture 2.10) [Drill] Upgrade Saver
Go to any NPC Repair, then select Create Item (สร้างไอเทม), put Upgrade Saver 2 pieces into the slot, then click create and [Drill] Upgrade Saver will appear.
How to find Normal Saver
Normal Saver can be found by complete [Bingo] Normal Saver, Bingo item can be purchase at NPC Doctor Gye in Dark City.
Picture 2.11) Normal Saver Bingo
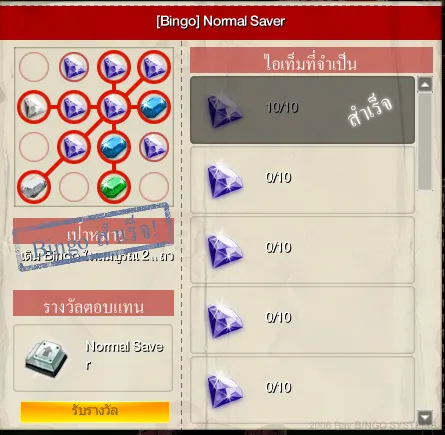
Picture 2.12) Normal Saver Bingo Showcase
2.8 EV Cash Back Bingo is available in Bingo Shop under Game category, when complete the Bingo will get 100K RAIN Gift Box
Picture 2.13) EV Cash Back Bingo
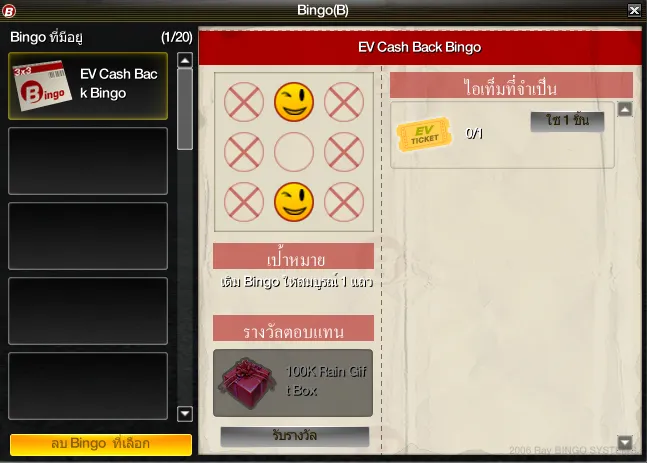
Picture 2.14) EV Cash Back Bingo Showcase
2.9 Add 4TH Anniversary Set, this set are including Lamp, Film and Plate
Picture 2.15) 4TH Anniversary Showcase
Bonus Set
Red RPM +10
Max RPM +10
Torque +10
Booster Power +5.0 (%)
Boost Overdrive +5.0 (%)
Mission Satisfaction +7
Collision Impact +7.0
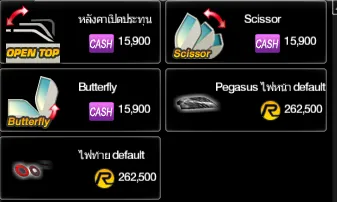
2.10 Add Wing Papaya available in Parts Shop price 12,900 Cash
Picture 2.16) Wing Papaye Showcase
2.11 New Angel's Sign
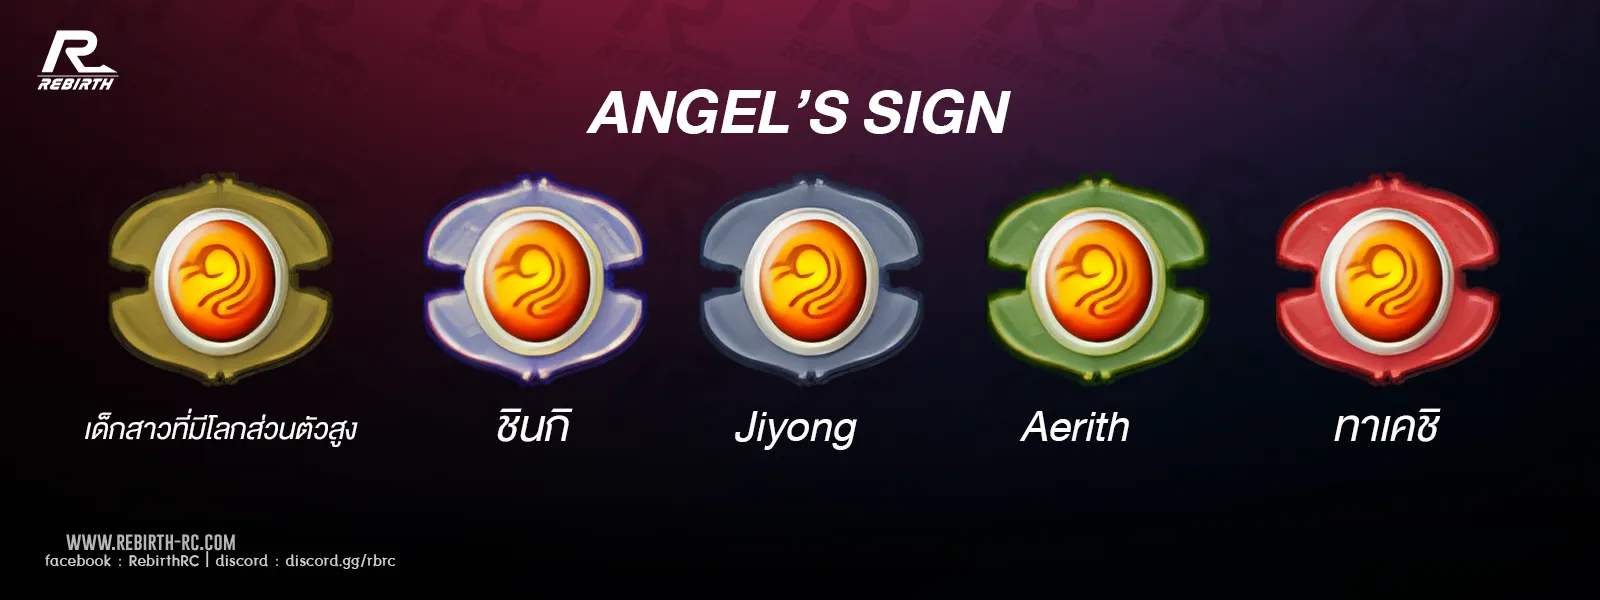
Picture 2.17) New Angel's Sign Showcase
3. New Quest
3.1 Add Unique Quest
A Wonderful Gift (การมอบของขวัญสุดพิเศษ) 1/8
4. Bug Fixes and Improvement
4.1 Add Town Lotto World, can be accessable when Driver Lv.14 or above
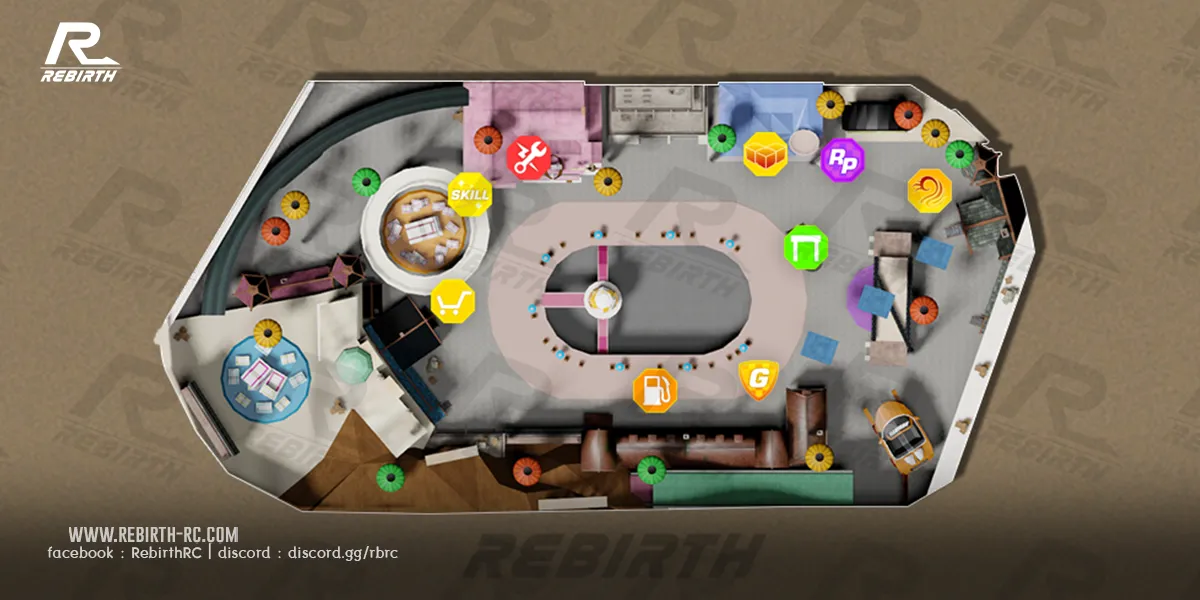
Picture 3.1) Town Lotto World Mini-Map
There are 4 ways to Enter the Town
1. SeoCho IC - Seoul Area (Level 14)
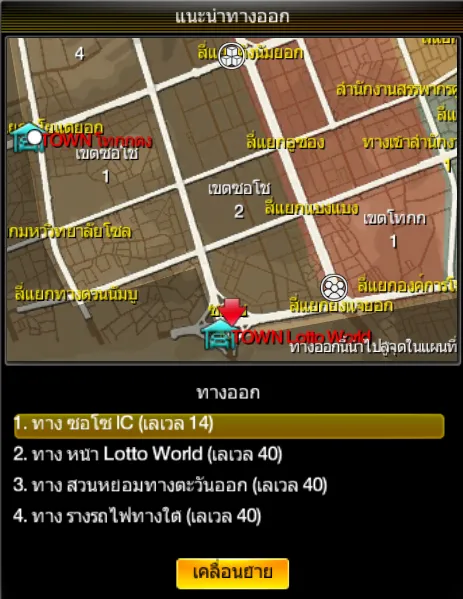
Picture 3.2) SeoCho IC Entrance
2. Lotto World - Seoul Area (Level 40)
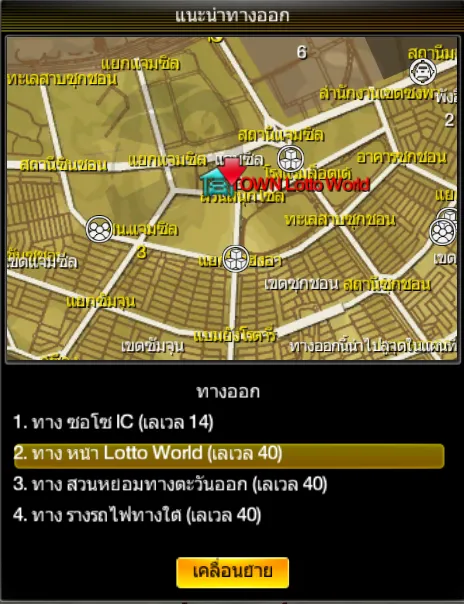
Picture 3.3) Front of Lotto World Entrance
3. East of Garden Field - Dark City (Level 40)
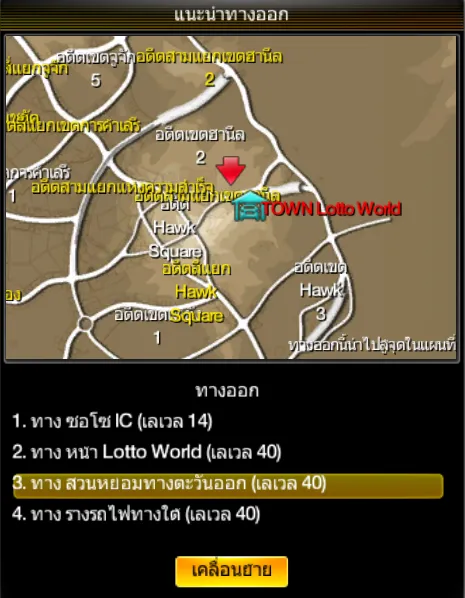
Picture 3.4) East of Flower Field Entrance
4. South Railway - Dark City (Level 40)
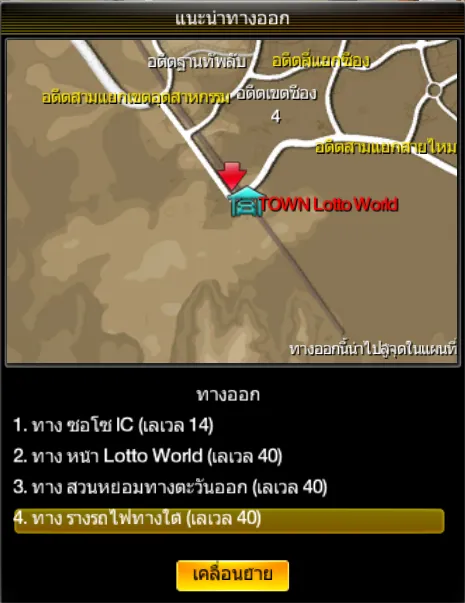
Picture 3.5) South Railroad Entrance
4.2 Rune System
Player have to play Saver Mode, each Ranking has different prizes, [Saver] Big Gift Box, [Saver] Gift Box, [Saver] Box. These 3 boxes contain Rune Stones.
How to get Power Rune Stone.
Power Rune Stone can be obtain by [Saver] Power Rune Bingo and uses Rune Stones as a material.
When complete the Bingo, will receive Power Rune
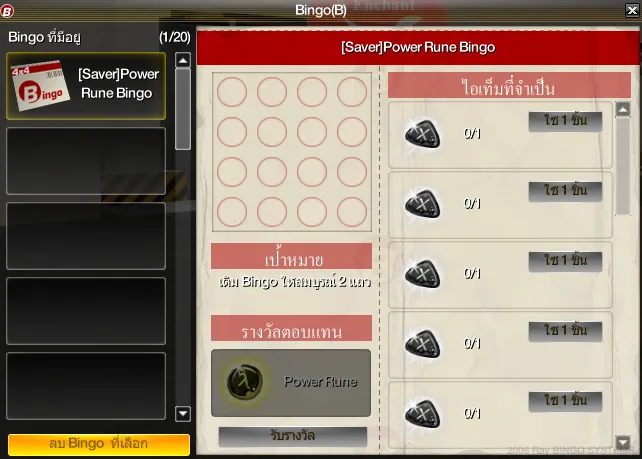
Picture 3.6) [Saver] Power Rune Bingo Showcase
As for Rare Lambda Rune and Rare pie Rune
By using [Saver] Rare Rune Bingo and Power Rune as a material.
When complete the Bingo, will randomly receive one of three Rune type.
Rare Lambda Rune
Rare pie Rune
Rune stones
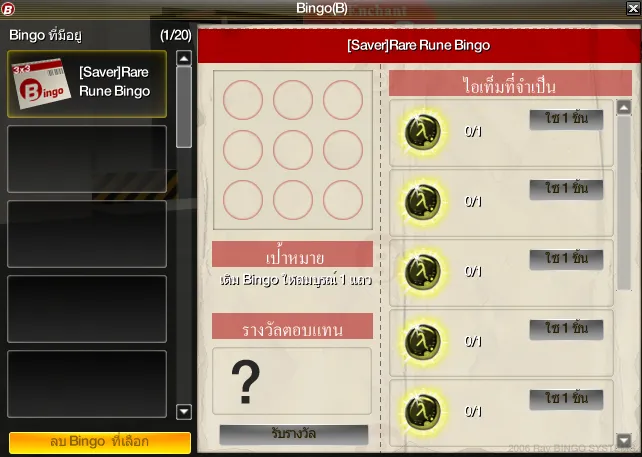
Picture 3.7) [Saver] Rare Rune Bingo Showcase
As for Unique Lambda Rune , Unique pie Rune and Unique tau Rune.
By using [Saver] Unique Rune Bingo, Rare Lambda Rune and Rare pie Rune as materials
When complete the Bingo, will randomly receive one of four Rune type.
Unique Lambda Rune
Unique pie Rune
Unique tau Rune
Rune stones
Caution: Power Rune, Rare Lambda Rune, Rare pie Rune, Unique Lambda Rune, Unique pie Rune and Unique tau Rune can be sell in Market but player will not able to see the option of the Rune. We'd recommend doing through Trading System.
How to equip Rune
Picture 3.8) NPC Repair under Create
By going to on any NPC Repair, then select Create Item (สร้างไอเทม). Use [Drill] Upgrade Saver and Rune that player wanted to put it into Upgrade Saver.
Upgrade Saver can be drilled 3 times, but cannot equip with the same Rune type.
For example, If player equip with Unique Lambda Rune, player cannot equip Unique Lambda Rune again, but can equip with Rare Lambda Rune.
If player wants to remove the current Rune, use Socket initialization item to remove Rune.
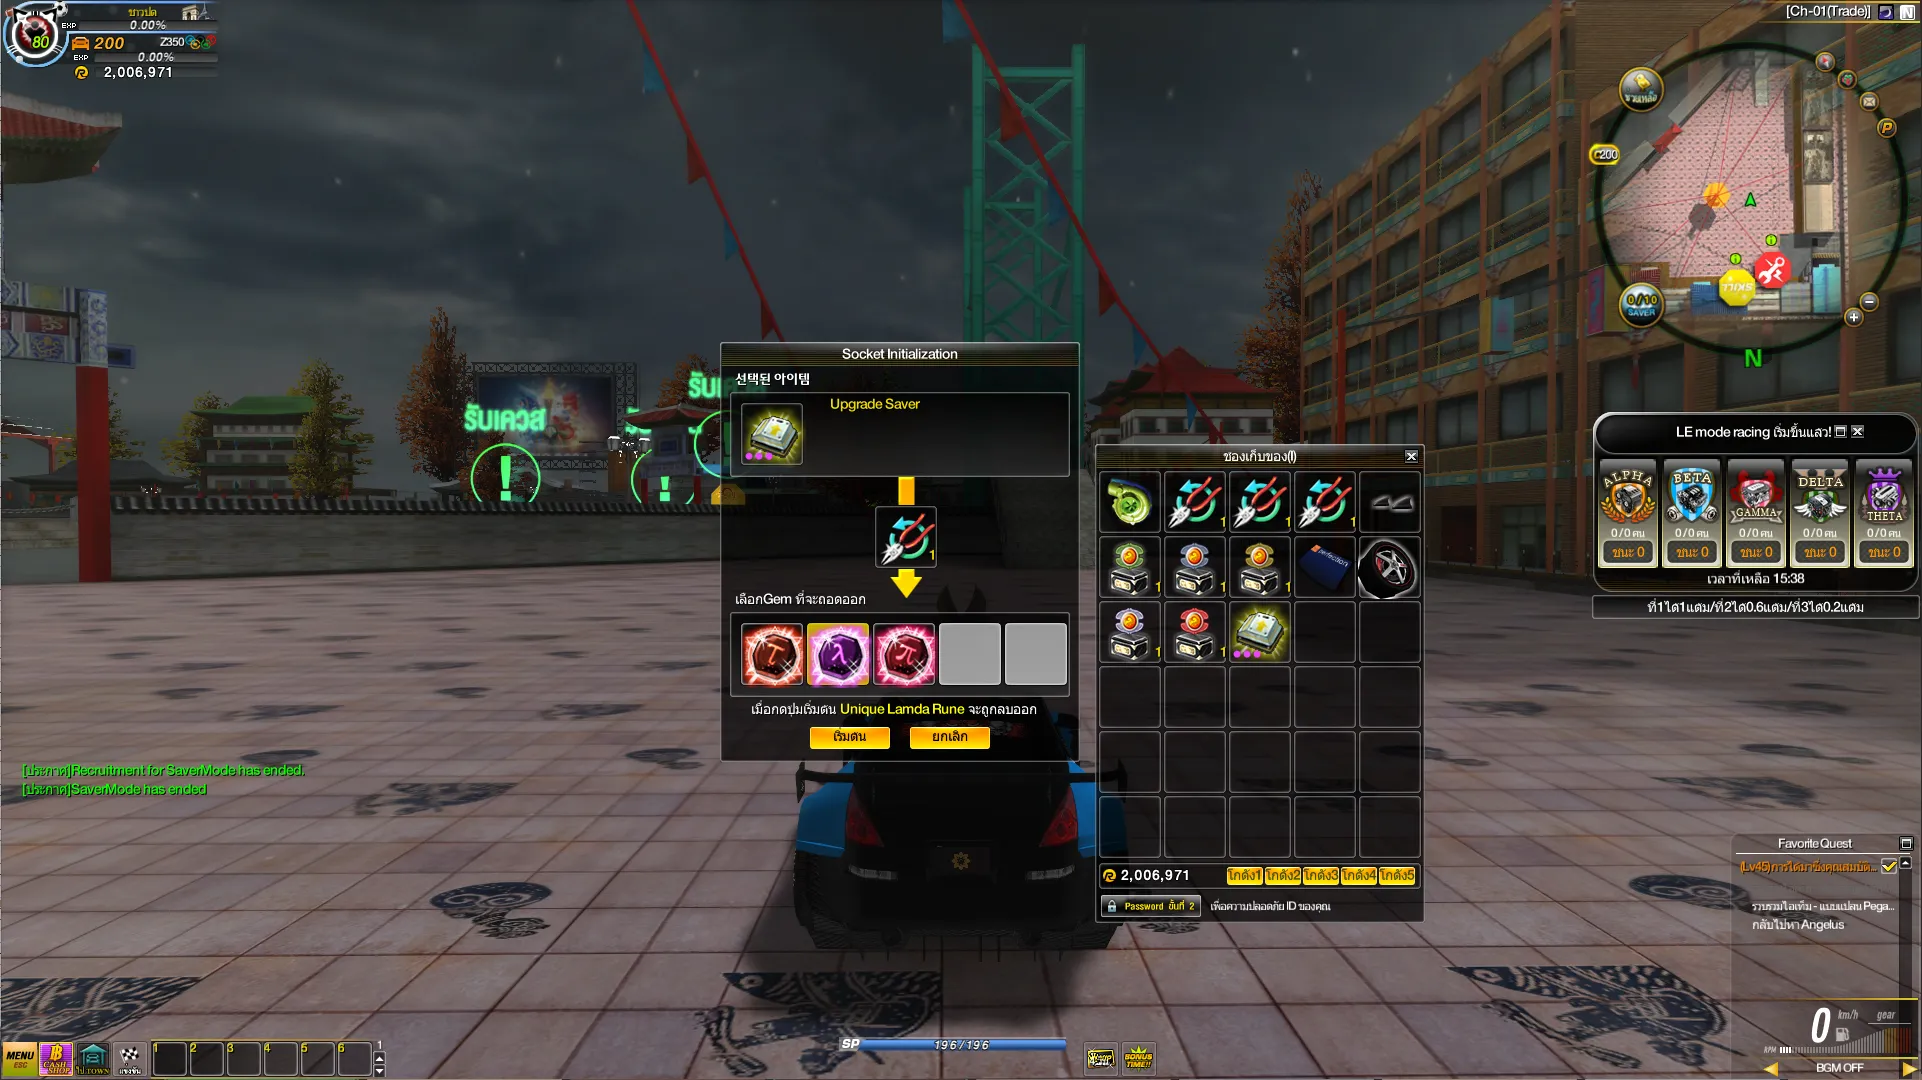
Picture 3.9) Socket initialization Showcase
Caution: When using Socket initialization for remove Rune from Upgrade Saver, the removed Rune will be disappeared.
Here are list of Rune options
| Rune | Option |
| Power Rune | Max RPM + 4 - 12 |
| Red RPM + 4 - 12 | |
| Torque + 4.0 (Nm) - 12.0 (Nm) | |
| Rare Lamda Rune | Max RPM + 10 - 20 |
| Booster Power + 1.8 % - 5.8 % | |
| Collision Impact + 2.0 - 6.0 | |
| Rare pie Rune | Red RPM + 10 - 20 |
| Torque + 10.0 (Nm) - 20.0 (Nm) | |
| Boost Overdrive + 1.0 % - 2.0 % | |
| Unique Lamda Rune | Max RPM + 18 - 28 |
| Booster Power + 5.0 % - 9.0 % | |
| Collision Impact + 5.0 - 9.0 | |
| Unique pie Rune | Red RPM + 18 - 28 |
| Torque + 18.0 (Nm) - 28.0 (Nm) | |
| Boost Overdrive + 1.8 % - 2.8 % | |
| Unique tau Rune | Mission Satisfaction +3 - 8 |
| Max SP +3 - 8 | |
| Booster Longer +0.02 - +0.12 (Sec) |
4.3 Points Capsule
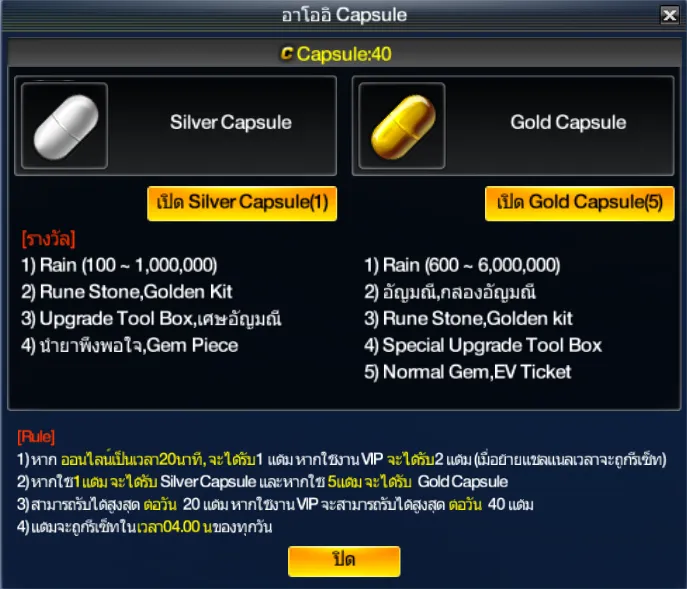
Picture 3.10) Points Capsule
List of items in Silver Capsule
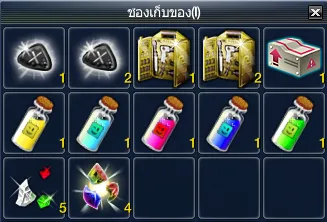
Picture 3.11) Silver Capsule Prize Showcase
| Item | Amount | Rate (%) |
| Rune Stone | 1 | 1.72 |
| Rune Stone | 2 | 0.86 |
| Car Enchant Gold Kit | 1 | 0.86 |
| Car Enchant Gold Kit | 2 | 2.58 |
| Upgrade Tool Box | 1 | 2.58 |
| Satisfaction Potion Class A | 1 | 2.58 |
| Satisfaction Potion Class B | 1 | 2.58 |
| Satisfaction Potion Class C | 1 | 2.58 |
| Satisfaction Potion Class D | 1 | 2.58 |
| Satisfaction Potion Class E | 1 | 2.58 |
| Jewelry Shards | 5 | 4.31 |
| Rainbow Gem Piece | 4 | 4.31 |
| Rain = 100 | 1 | 12.06 |
| Rain = 1,000 | 1 | 17.24 |
| Rain = 5,000 | 1 | 17.24 |
| Rain = 10,000 | 1 | 12.06 |
| Rain = 30,000 | 1 | 8.62 |
| Rain = 50,000 | 1 | 5.17 |
| Rain = 100,000 | 1 | 3.44 |
| Rain = 1,000,000 | 1 | 0.86 |
The possible outcome is not over than 3 decimal, when combined, it will not be 100%.
List of items in Gold Capsule
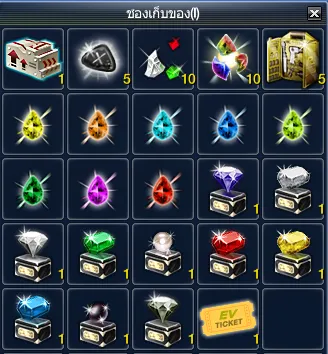
Picture 3.12) Gold Capsule Prize Showcase
EV Ticket cannot be trade
| Item | Amount | Rate (%) |
| Special Upgrade Tool Box | 1 | 0.97 |
| Rune Stone | 5 | 3.88 |
| Jewelry Shards | 10 | 3.88 |
| Rainbow Gem Piece | 10 | 3.88 |
| Car Enchant Gold Kit | 5 | 3.88 |
| Normal Average Speed Gem | 1 | 3.88 |
| Normal Boost Duration Gem | 1 | 3.88 |
| Normal Torque Gem | 1 | 3.88 |
| Normal Satisfaction Gem | 1 | 3.88 |
| Normal Boost Overdrive Gem | 1 | 3.88 |
| Normal SP Gem | 1 | 3.88 |
| Normal Max Speed Gem | 1 | 3.88 |
| Normal Boost Power Gem | 1 | 3.88 |
| Blue Diamond Box | 1 | 3.88 |
| Crystal Box | 1 | 3.88 |
| Blue Diamond Box | 1 | 3.88 |
| Emerald Box | 1 | 3.88 |
| Pearl Box | 1 | 3.88 |
| Ruby Box | 1 | 3.88 |
| Topaz Box | 1 | 3.88 |
| Sapphire Box | 1 | 3.88 |
| Black Pearl Box | 1 | 3.88 |
| Black Diamond Box | 1 | 0.97 |
| EV Ticket | 1 | 2.91 |
| Rain = 600 | 1 | 3.88 |
| Rain = 6,000 | 1 | 3.88 |
| Rain = 60,000 | 1 | 3.88 |
| Rain = 600,000 | 1 | 1.94 |
| Rain = 6,000,000 | 1 | 0.97 |
The possible outcome is not over than 3 decimal, when combined, it will not be 100%.
4.4 Fix and decrease the amount of boxes for Driver Tire Repair Set
Super Tire use 1 box of Topaz
Tire Sirius use 1 box of Sapphire
Skyforce Tire use 1 box of Black Pearl
4.5 Adjust Saver Mode
1. Change the amount of round from 3 to 2
2. Change the amount of time from 40 minutes to 30 minutes.
3. Fix bug when finishes to be able to collect the prize normally.
Adjust Saver Mode Form System
Shirtless Zombie - When car crashes into this zombie, will lose huge amount of SP
Big Zombie - When car crashes into this zombie, carried spirit's HP will decrease and player car will be pushed.
Gray Zombie - When car crashes into this zombie, car will be poisonous, this poisonous effect working like a bomb, when getting attacked 3 times spirit's HP will heavily decreased.
4.6 Skill Related Fixes
Suppressed Booster Skill has been fixed to display correctly.
Multi-icon Skill has been fixed
4.7 Remove Fuel Consumption Option from [Enchant] Wolf Brave Warrior, [Set5] Samurai Set and SIGMA 3.0 Engine
4.8 Fix Power Option of SIGMA Engine 3.0
| Item | Power Option | Rare Option | Unique Option |
| SIGMA Engine 3.0 | Torque 2-40 | Red RPM 25-500 | Max RPM 50-1,000 |
| Red 5-100 | Boost Power 2-40 | Decrease SP Boost -1 to -5 | |
| Mission Satisfaction 2-40 |
Boost Overdrive 2-40 | Booster Longer 0.07 to 1.40 |
|
| Impact Collision 1.0 - 10.0 | Max SP 2 - 40 | ||
| 4 Fixed Options | 2 Random Options | 2 Random Options |
Red value in Power Option will have value different of 5.
Note: We have detected something weird with Fuel Consumption option, which will affect the system in the future, we have to remove the option.
4.9 Adjust Bonus Set of Handling Set
Old Option from August
| Level | Item | Power Option | Rare Option | Unique Option |
|
5
|
Aaron
|
Red RPM +200 | Red RPM +200 | Red RPM +200 |
| Max RPM +200 | Max RPM +400 | Max RPM +400 | ||
| |
Torque +20.0 (Nm) | Torque +20.0 (Nm) | ||
| Mission Satisfaction +3 | Boost Duration + 0.10 (Secs) |
|||
| |
Mission Satisfaction +3 | |||
| Booster Power +20 (Nm) | ||||
| MAX SP +2 | ||||
|
|
|
|||
|
25
|
Burning
|
Red RPM +215 | Red RPM +215 | Red RPM +215 |
| Max RPM +210 | Max RPM +420 | Max RPM +420 | ||
| |
Torque +22.0 (Nm) | Torque +22.0 (Nm) | ||
| Mission Satisfaction +6 | Boost Duration + 0.15 (Secs) |
|||
| |
Mission Satisfaction +6 | |||
| Booster Power +20 (Nm) | ||||
| MAX SP +4 | ||||
|
|
|
|||
|
45
|
Falkem
|
Red RPM +230 | Red RPM +230 | Red RPM +230 |
| Max RPM +220 | Max RPM +440 | Max RPM +440 | ||
| |
Torque +24.0 (Nm) | Torque +24.0 (Nm) | ||
| Mission Satisfaction +9 | Boost Duration + 0.20 (Secs) |
|||
| |
Mission Satisfaction +9 | |||
| Booster Power +22 (Nm) | ||||
| MAX SP +6 | ||||
|
|
|
|||
|
65
|
Angel
|
Red RPM +245 | Red RPM +245 | Red RPM +245 |
| Max RPM +230 | Max RPM +460 | Max RPM +460 | ||
| |
Torque +26.0 (Nm) | Torque +26.0 (Nm) | ||
| Mission Satisfaction +12 | Boost Duration + 0.25 (Secs) |
|||
| |
Mission Satisfaction +12 | |||
| Booster Power +24 (Nm) | ||||
| MAX SP +8 | ||||
|
|
|
|||
|
85
|
Max Liner
|
Red RPM +260 | Red RPM +260 | Red RPM +260 |
| Max RPM +240 | Max RPM +480 | Max RPM +480 | ||
| |
Torque +28.0 (Nm) | Torque +28.0 (Nm) | ||
| Mission Satisfaction +15 | Boost Duration + 0.30 (Secs) |
|||
| |
Mission Satisfaction +15 | |||
| Booster Power +26 (Nm) | ||||
| MAX SP +10 | ||||
|
|
|
|||
|
105
|
Craft
|
Red RPM +275 | Red RPM +275 | Red RPM +275 |
| Max RPM +250 | Max RPM +500 | Max RPM +500 | ||
| |
Torque +30.0 (Nm) | Torque +30.0 (Nm) | ||
| Mission Satisfaction +18 | Boost Duration + 0.35 (Secs) |
|||
| |
Mission Satisfaction +18 | |||
| Booster Power +28 (Nm) | ||||
| MAX SP +12 | ||||
|
|
|
|||
|
125
|
Breezestone
|
Red RPM +275 | Red RPM +275 | Red RPM +275 |
| Max RPM +260 | Max RPM +500 | Max RPM +500 | ||
| |
Torque +30.0 (Nm) | Torque +30.0 (Nm) | ||
| Mission Satisfaction +21 | Boost Duration + 0.35 (Secs) |
|||
| |
Mission Satisfaction +21 | |||
| Booster Power +30 (Nm) | ||||
| MAX SP +14 | ||||
|
|
|
|||
|
145
|
Primary
|
Red RPM +305 | Red RPM +305 | Red RPM +305 |
| Max RPM +270 | Max RPM +540 | Max RPM +540 | ||
| |
Torque +34.0 (Nm) | Torque +34.0 (Nm) | ||
| Mission Satisfaction +24 | Boost Duration + 0.45 (Secs) |
|||
| |
Mission Satisfaction +24 | |||
| Booster Power +32 (Nm) | ||||
| MAX SP +16 | ||||
|
|
|
|||
|
150
|
Sparkwave
|
Red RPM +320 | Red RPM +320 | Red RPM +320 |
| Max RPM +280 | Max RPM +560 | Max RPM +560 | ||
| |
Torque +36.0 (Nm) | Torque +36.0 (Nm) | ||
| Mission Satisfaction +27 | Boost Duration + 0.50 (Secs) |
|||
| |
Mission Satisfaction +27 | |||
| Booster Power +36 (Nm) | ||||
| MAX SP +18 | ||||
|
|
|
|||
|
185
|
Crossfire
|
Red RPM +335 | Red RPM +335 | Red RPM +335 |
| Max RPM +290 | Max RPM +580 | Max RPM +580 | ||
| |
Torque +38.0 (Nm) | Torque +38.0 (Nm) | ||
| Mission Satisfaction +30 | Boost Duration + 0.55 (Secs) |
|||
| |
Mission Satisfaction +30 | |||
| Booster Power +38 (Nm) | ||||
| MAX SP +20 |
New Options
| Level | Item | Power Option | Rare Option | Unique Option |
|
5
|
Aaron
|
Red RPM +200 | Red RPM +200 | Red RPM +200 |
| Max RPM +400 | Max RPM +400 | Max RPM +400 | ||
| |
Torque +20.0 (Nm) | Torque +20.0 (Nm) | ||
| Mission Satisfaction +1 | Booster Longer 0.10 (Sec) | |||
| MAX SP +1 | Mission Satisfaction +3 | |||
| |
Booster Power +20 (Nm) | |||
| MAX SP +2 | ||||
|
25
|
Burning
|
Red RPM +215 | Red RPM +215 | Red RPM +215 |
| Max RPM +420 | Max RPM +420 | Max RPM +420 | ||
| |
Torque +22.0 (Nm) | Torque +22.0 (Nm) | ||
| Mission Satisfaction +2 | Booster Longer 0.15 (Sec) | |||
| MAX SP +2 | Mission Satisfaction +6 | |||
| |
Booster Power +22 (Nm) | |||
| MAX SP +4 | ||||
|
45
|
Falkem
|
Red RPM +230 | Red RPM +230 | Red RPM +230 |
| Max RPM +440 | Max RPM +440 | Max RPM +440 | ||
| |
Torque +24.0 (Nm) | Torque +24.0 (Nm) | ||
| Mission Satisfaction +3 | Booster Longer 0.20 (Sec) | |||
| MAX SP +3 | Mission Satisfaction +9 | |||
| |
Booster Power +24 (Nm) | |||
| MAX SP +6 | ||||
|
65
|
Angel
|
Red RPM +245 | Rare Option | Red RPM +245 |
| Max RPM +460 | Red RPM +245 | Max RPM +460 | ||
| |
Max RPM +460 | Torque +26.0 (Nm) | ||
| Torque +26.0 (Nm) | Booster Longer 0.25 (Sec) | |||
| Mission Satisfaction +4 | Mission Satisfaction +12 | |||
| MAX SP +4 | Booster Power +26 (Nm) | |||
| MAX SP +8 | ||||
|
85
|
Max Liner
|
Red RPM +260 | Red RPM +260 | Red RPM +260 |
| Max RPM +480 | Max RPM +480 | Max RPM +480 | ||
| |
Torque +28.0 (Nm) | Torque +28.0 (Nm) | ||
| Mission Satisfaction +5 | Booster Longer 0.30 (Sec) | |||
| MAX SP +5 | Mission Satisfaction +15 | |||
| |
Booster Power +28 (Nm) | |||
| MAX SP +10 | ||||
|
105
|
Craft
|
Red RPM +275 | Red RPM +275 | Red RPM +275 |
| Max RPM +500 | Max RPM +500 | Max RPM +500 | ||
| |
Torque +30.0 (Nm) | Torque +30.0 (Nm) | ||
| Mission Satisfaction +6 | Booster Longer 0.35 (Sec) | |||
| MAX SP +6 | Mission Satisfaction +18 | |||
| |
Booster Power +30 (Nm) | |||
| MAX SP +12 | ||||
|
125
|
Breezestone
|
Red RPM +275 | Rare Option | Red RPM +275 |
| Max RPM +500 | Red RPM +275 | Max RPM +500 | ||
| |
Max RPM +500 | Torque +30.0 (Nm) | ||
| Torque +30.0 (Nm) | Booster Longer 0.35 (Sec) | |||
| Mission Satisfaction +7 | Mission Satisfaction +21 | |||
| MAX SP +7 | Booster Power +32 (Nm) | |||
| MAX SP +14 | ||||
|
145
|
Primary
|
Red RPM +305 | Red RPM +305 | Red RPM +305 |
| Max RPM +540 | Max RPM +540 | Max RPM +540 | ||
| |
Torque +34.0 (Nm) | Torque +34.0 (Nm) | ||
| Mission Satisfaction +8 | Booster Longer 0.45 (Sec) | |||
| MAX SP +8 | Mission Satisfaction +24 | |||
| |
Booster Power +34 (Nm) | |||
| MAX SP +16 | ||||
|
150
|
Sparkwave
|
Red RPM +320 | Red RPM +320 | Red RPM +320 |
| Max RPM +560 | Max RPM +560 | Max RPM +560 | ||
| |
Torque +36.0 (Nm) | Torque +36.0 (Nm) | ||
| Mission Satisfaction +9 | Booster Longer 0.50 (Sec) | |||
| MAX SP +9 | Mission Satisfaction +27 | |||
| |
Booster Power +36 (Nm) | |||
| MAX SP +18 | ||||
|
185
|
Crossfire
|
Red RPM +335 | Red RPM +335 | Red RPM +335 |
| Max RPM +580 | Max RPM +580 | Max RPM +580 | ||
| |
Torque +38.0 (Nm) | Torque +38.0 (Nm) | ||
| Mission Satisfaction +10 | Booster Longer 0.55 (Sec) | |||
| MAX SP +10 | Mission Satisfaction +30 | |||
| |
Booster Power +38 (Nm) | |||
| MAX SP +20 | ||||
PSA: Related to Rune and Turbo Charger bugs.
We have detected that Power Rune, Rare Lambda Rune, Rare pie Rune, Unique Lambda Rune, Unique pie Rune and Unique tau Rune has been sell into the Market, player who wants to buy the item will not be able to see the Rune Option.
As Turbo Charger, If player sell the item into the Market, player will not be able to see their in the Market and cannot pull the item back by themselves, player have to wait for the system to pull it back. as for buyer who wants to buy the Turbo Charger will not be able to see the item as well. We'd recommend to buy through Trading System.
5. New Race Track
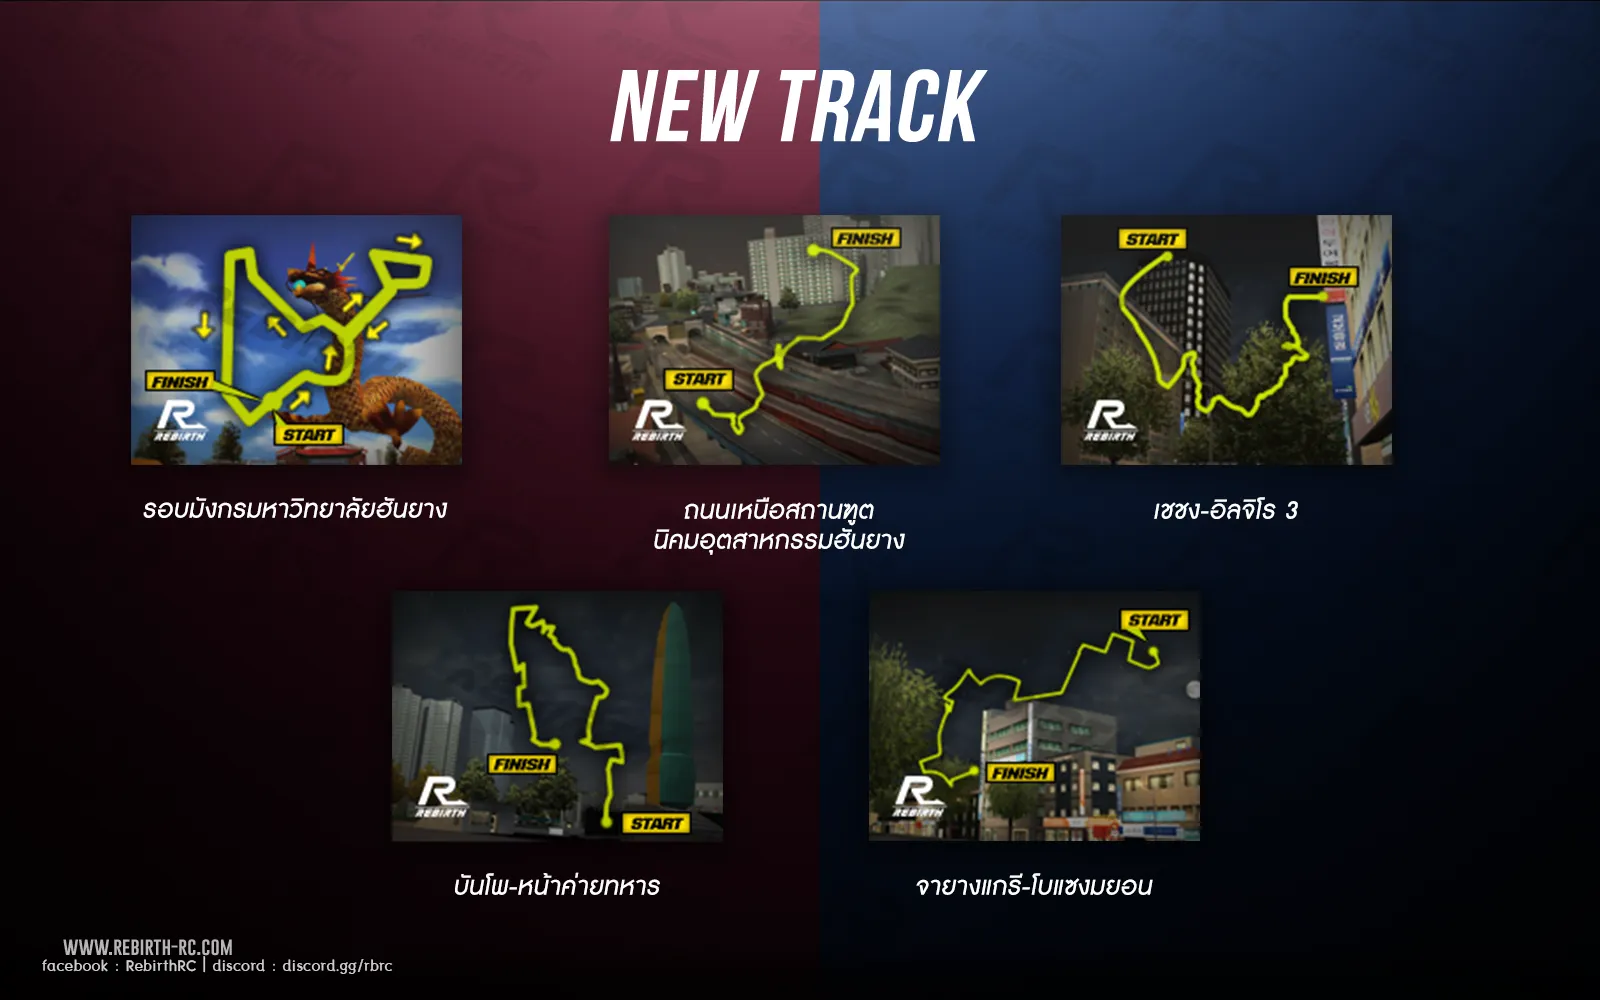
Picture 4.1) New Race Track
[RB]เชชง-อิลจิโร3
[RB]ถนนเหนือสถานฑูต-นิคมอุตสาหกรรมฮันยาง
[RB]จายางแกรี-โบแซงมยอน
[RB]บันโพ-หน้าค่ายทหาร
[RB] รอบมังกรมหาวิทยาลัยฮันยาง
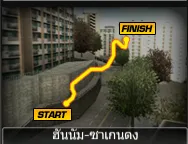
ฮันนัม-ซาเกนดง
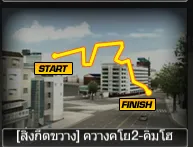
[สิ่งกีดขวาง] ควางคโย2-คิมโฮ
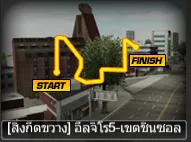
[สิ่งกีดขวาง] อิลจิโร5-เขตชินซอล
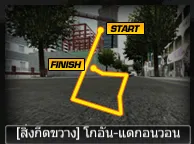
[สิ่งกีดขวาง] โกอัน-แดกอนวอน
6. New LE Mode Race Track
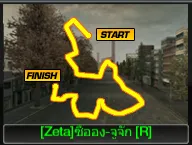
[Zeta]ซีออง-จูจัก [R]
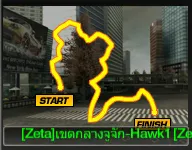
[Zeta] เขตกลางจูจัก-Hawk1
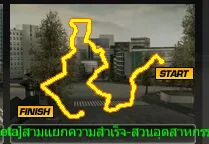
[Zeta] สามแยกความสำเร็จ-สวนอุตสาหกรรม
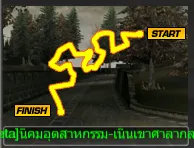
[Zeta] นิคมอุตสาหกรรม-เนินเขาศาลากลาง
We have the right to change the patch details without any further announcement.
If you have any question, please do not hesitate contact to us.
Through our Support on Discord or Email: [email protected]


REBIRTH-RC
© 2021 RebirthRC, All Rights Reserved.
You have question? Contact with support member on Discord.
Contact: [email protected]